Build an audience
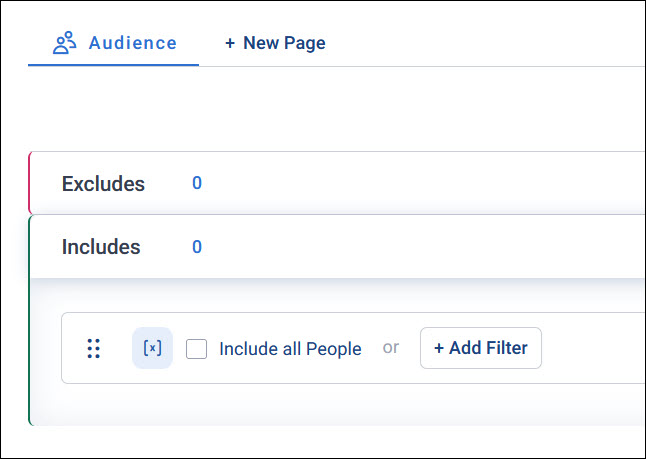
On the Audience tab, build your audience by including and excluding characteristics. For example, you might include your high value supporters but exclude anyone who's recently donated or opted out of communication.
Choose a table level
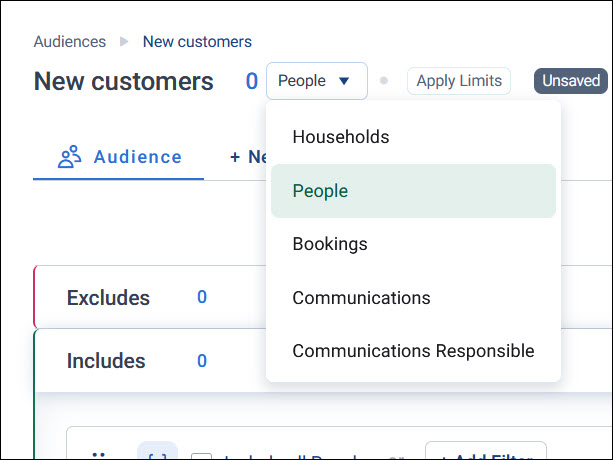
Decide what you're trying to count, such as people or transactions. Then select the table level for your audience from the dropdown next to its name and count.
Note
Your administrator sets a system default table level. On Apteco's Holidays system, this is People.
Add a filter
Each filter in an audience's Includes or Excludes selects records by one characteristic, such as a variable's values or membership of another audience.
To add a filter:
-
Under Includes or Excludes, select + Add Filter.
-
In the data picker, choose what to filter by: a variable, an audience or a file, a behaviour, or an expression.
-
Choose the values to include or exclude. The options depend on what you chose:
- A variable: Depends on its type, such as selector, text, numeric or currency, date, or reference
- An audience or a file: Choose In or Not in. See Audiences and files.
- A behaviour or an expression: Set the values to filter on, as for a variable. See Behaviours and Build an expression.
-
Select Apply.
Add more filters to build up sections of your audience, and choose how their characteristics combine.
Tip
To start with every record in your audience's table, select the Include all tick box instead of adding a filter under Includes. The tick box names your table, such as Include all People. Then add filters under Excludes to leave records out.
Note
Behaviours aren't available in measure filters or compare filters within audiences.
Edit a filter's values
When you apply a filter, its values appear in your audience. You can add and remove values without building the filter again:
- Remove a value: Select the x next to it
- Add values: Select + Add Values, choose or enter the values, and select Apply
- Change a date range: Select the summary of the range to edit it
Your audience's count updates as you change its filters.
Reuse an audience or a file
Instead of rebuilding the same criteria in every audience, add an existing audience or a file as a filter:
- Another audience: For example, your active supporters, or a master suppression list, such as supporters who've complained, asked not to be contacted, changed their marketing preferences, or died. If someone changes it, every audience that uses it picks up the change. An audience you use can itself use another audience.
- A URN file: A list of specific records, such as a seed list, competition winners, or people who signed up at an event
- A FastStats selection: A segment built in FastStats, such as lapsing or loyal supporters, used as part of your target audience or your exclusions
Example
To leave supporters who've asked not to be contacted out of an appeal, add a filter under Excludes, choose your "Do-not-contact" audience or a URN file of their references, and choose In.
Note
A URN file holds records from one table, such as people or households. Adding one doesn't always change your audience's count, because your audience may not include any of the file's records.
See Audiences and files for how audiences and files work as filters.
Save your audience
Orbit doesn't save your changes to an audience automatically. Until you save them, an Unsaved label shows at the top of the audience.
To save your changes, select Save in the top-right corner of the audience.
Undo, redo, and reset
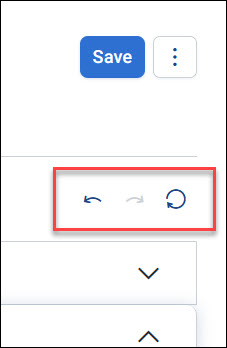
Use the Undo, Redo, and Reset icons below Save to go back to an earlier state of your audience.
Rename your audience
You name your audience when you create it. You can rename it at any time, in either of these ways:
- Select its name: Select the name at the top of the audience, type the new name, then select away from it or press Enter
- Use the options menu: Open the options menu in the top-right corner of the audience, and select Rename
Add a campaign brief
Keep your campaign brief beside your audience while you build it.
To add a campaign brief:
-
Open the options menu in the top-right corner of the audience, and select Show Brief.
-
Copy and paste your campaign brief into the Brief panel.
Leave the panel open for reference while you build your audience, or select Hide Brief in the same options menu to close it.