Journey steps
Journey steps are the building blocks of your campaign journeys in Apteco Orbit. You can design targeted campaigns by guiding your audience through a series of well-defined stages.
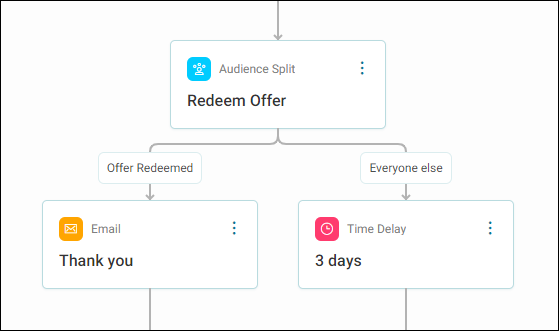
Here are the key elements:
- Target segment step: Identify and segment your target audience. See Including and excluding audiences.
- Channel step: Utilise various communication channels like email, WhatsApp, etc. See Campaign channels.
- Interaction split: Divide your audience into segments and direct each down different paths. See Interaction splits.
- Audience split: Customise your campaigns based on recipient interactions. See Audience splits.
- Time delay: Introduce pauses between stages in your campaign journey. See Time delays.
- Sections and path redirects: Build complex campaigns and keep journeys clean and efficient by redirecting paths anywhere in your campaign. See Redirect sections.
Note
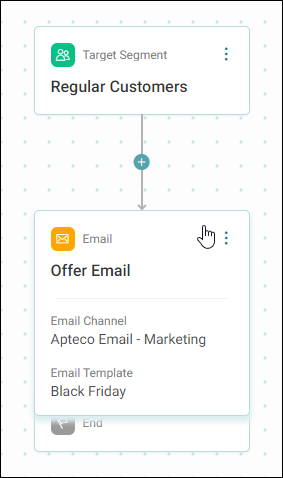
Each journey steps displays the step type with details on path flow, and the name you have given the step.
Expand any step by hovering your cursor over to show further details, such as audience net counts, email template, or time delay duration.
Tip
You can rename any step, section, or triggered event at any time while editing your campaign. Click directly on its name to edit it in place, then click away or press Enter to confirm.
Exit campaign step
The default step at the end of a campaign exits participants from the journey.
Hold participants
The Hold participants option on the same step lets you keep participants at the end of a campaign journey indefinitely, rather than exiting them immediately.
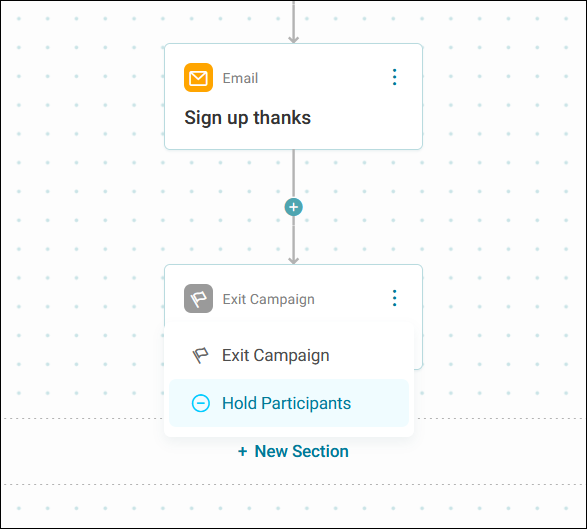
This is useful when you have a Triggered events campaign where participants reach milestones independently and at different times. Instead of using Time delays to keep participants in the diagram, you hold them indefinitely and let your triggered events handle progression and exit.
Adding journey steps
Once you have created your audience, the next task is to add a communication output channel.
To add a channel step:
- Click the + on the campaign journey.
-
Choose the Journey Step required. In this case, we have selected an Email output channel.
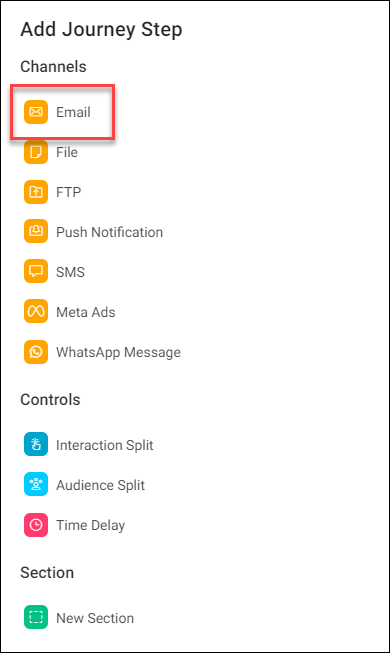
Once selected, the journey step appears on the campaign journey.
-
Click the Email step to add a name for it, then click Create.
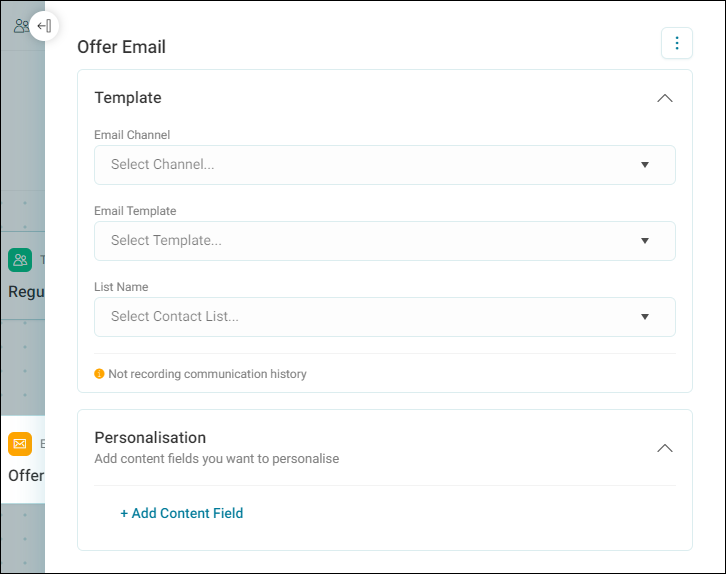
At this point, the journey builder updates to confirm that the channel has been created, and a settings panel appears on the right side of the screen. You can click anywhere on a journey step to open the settings side panel and start editing.
Note
You have the option to record communication history for your campaign later in the process, via Campaign set up. By default, the campaign is set not to record communication history. This is shown on the warning message during the email set up.
Note
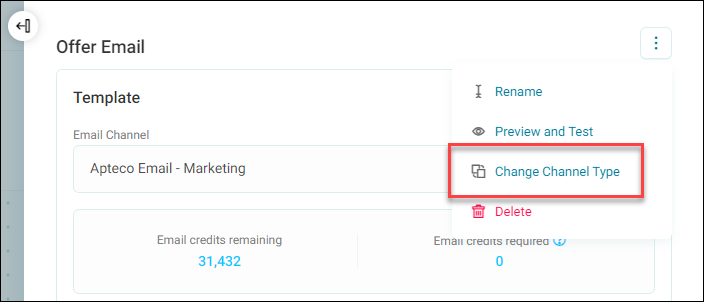
You can also change the channel type on the fly for a message step and retain all personalisation settings from the original channel. For example, you could change from an email step to a WhatsApp step without losing any personalisation.
Just click the Option menu in the step side panel, then click Change Channel Type.
You can now add many other journey steps to your campaign journey to create a personalised and engaging campaign. For more information on the steps available, see Setting up a multi-stage campaign and Redirect sections.
Copy and reuse journey steps
You can copy and paste individual steps within your campaign journey and sections. Aside from your initial audience, you can reuse any journey step, including messages, interaction splits, audience splits, and time delays. The copied elements retain all personalisation and setup details. This approach helps save time, improves campaign consistency, and simplifies the creation of complex customer journeys.
Reusing journey steps
To copy and paste a journey step:
- Open your campaign journey.
-
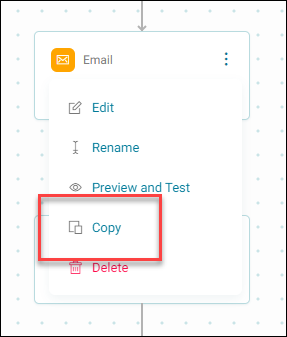
On the step you want to copy, click the options menu, then click Copy.
Note
A notification confirms when you have successfully copied steps to your Orbit clipboard.
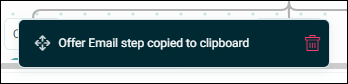
Click the red bin icon next to it to cancel the copy.
-
All available paste options now appear on your journey diagram.
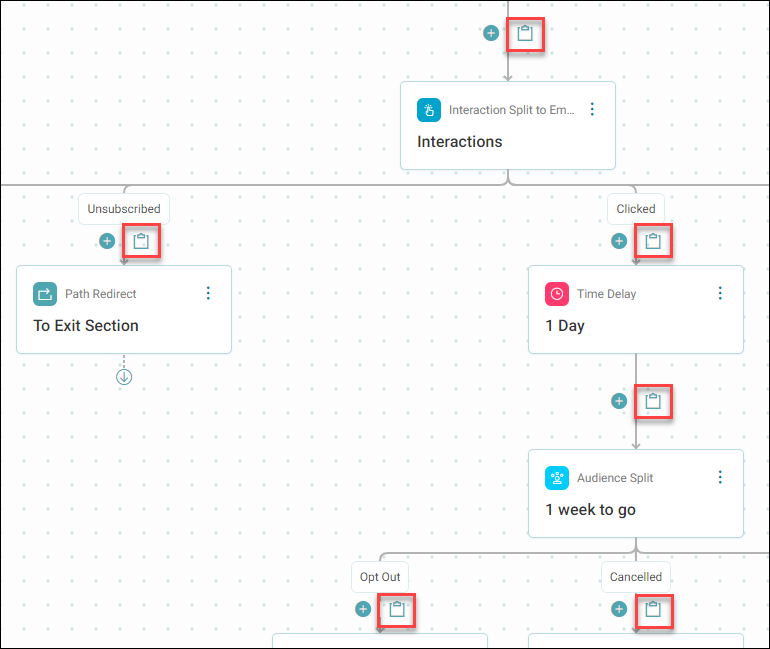
Paste the copied step into any suitable location within your campaign journey by clicking the clipboard icon.
Note
You can paste steps from the main diagram into a section.
The copied step retains all applied Message personalisation and settings.
-
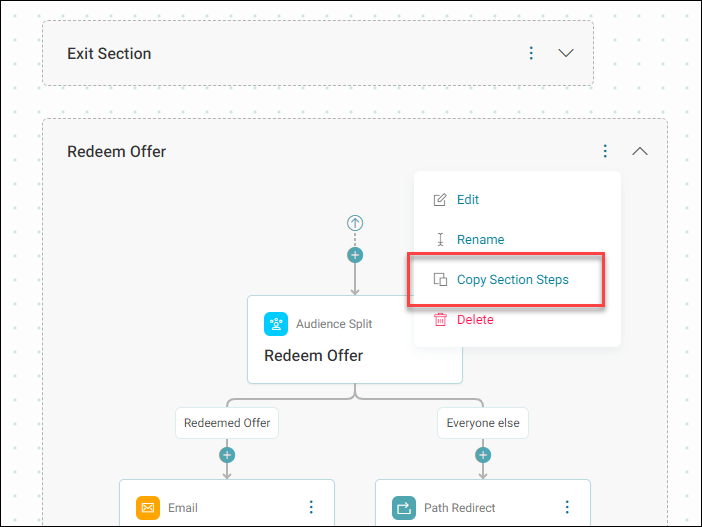
You can also copy multiple steps within a campaign section and reuse that content elsewhere in your campaign journey.
Go to your section, then click the options menu.
-
Click Copy Section Steps.
-
You can now paste the steps as you would any other journey step.
Note
You cannot copy a path redirect step.