Message personalisation
Personalise your campaign messages to create tailored content for different audience segments or individual recipients. Personalisation helps you increase engagement by delivering relevant, targeted messaging that resonates with each recipient.
Each content field you add creates a column in your output file with a header that matches the field name you specify. This makes the file easy to use with your email service provider (ESP) or other messaging channels.
Note
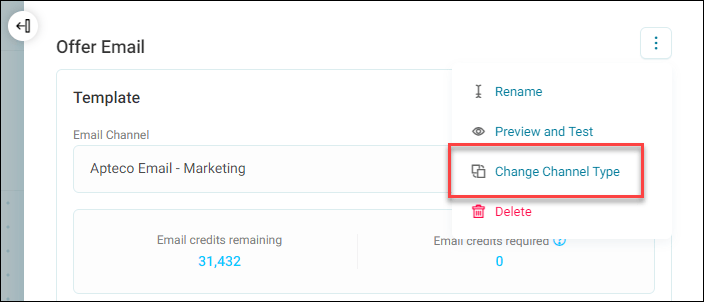
You can also change the channel type on the fly for a message step and retain all personalisation settings from the original channel. For example, you could change from an email step to a WhatsApp step without losing any personalisation.
Select the Option menu in the step side panel, then select Change Channel Type.
Adding content fields
You add content fields to create the personalised elements that appear as columns in your campaign output.
To add a content field:
- In your journey, open the message step you want to personalise.
- Under Personalisation, select + Add Content Field.
-
Give your field a name and select Add.
Tip
Give your content fields meaningful names that clearly identify their purpose.
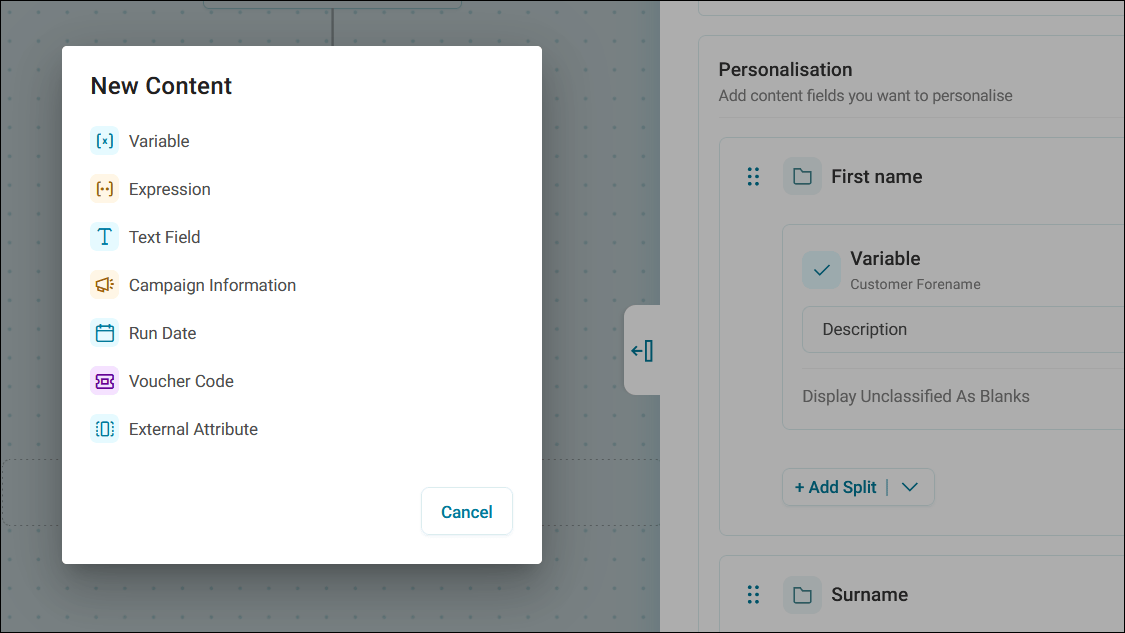
You can now choose the type of content field you want to use.
Note
Once you've selected your content field type, you can change it at any time: expand the option menu, then select Change Type.
Content field types
Orbit provides several content field types to support different personalisation needs.
Variable
References data fields defined in your system to insert individual-level information.
When you select a variable content field, you can then choose whether to display the variable's Description (readable text) or Code (system value) from the dropdown.
Optionally, enable Display Unclassified As Blanks to show blank values instead of "Unclassified" for missing data.
Expression
Uses an expression to calculate a value for each recipient, such as their age, the years since their first gift, or a flag set by an If statement. Expression content fields accept date, text, and numeric outputs.
Note
Available with the Analyser bundle or higher.
To add an expression content field:
-
Add a content field, and choose Expression as its type.
-
Under the content field, select + Add Expression.
-
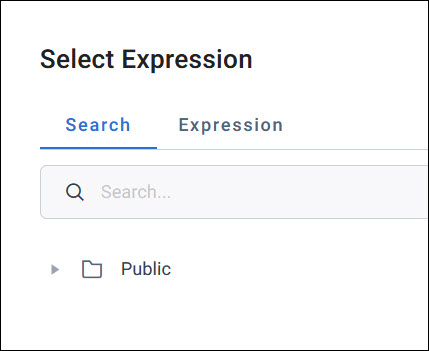
In the Select Expression dialogue, either:
- Use an expression saved in FastStats: On the Search tab, browse to the expression and select it.
- Write a new expression: Select the Expression tab and build an expression.
-
Select Apply.
The expression's value appears as a column in your campaign's output file. You can't view the expression in Orbit after you've added it.
Note
In personalisation, external data sources, system variables such as the run date, and drive time calculations aren't supported.
Start from one of the example expressions to adapt to your own data.
Behaviour
Uses a behaviour to personalise your message with a calculated value, such as a supporter's most recent donation or how recently they took an action. You create the behaviour in the data picker when you add the content field.
Text field
Adds static text content that applies to all recipients or a specific segment.
Voucher code
Assigns unique voucher codes from a predefined voucher set. You select your voucher code set from the Voucher Code Set dropdown. Make sure to review the number of available codes displayed to ensure you have sufficient codes for your audience.
Run date
Inserts the campaign execution date, useful for time-sensitive messaging or record-keeping. You have many date and time formats to choose from in the dropdown menu.
Campaign information
References metadata about the campaign itself, such as campaign name or message name.
External attribute
Links to custom data fields stored as code and description pairs in an SQL Server database outside your system.
Your system administrator will first need to set up your external attributes. See external attribute configuration.
These attributes works similarly to voucher codes, allowing you to dynamically insert values from your external database into campaign messages.
Duplicating a content field
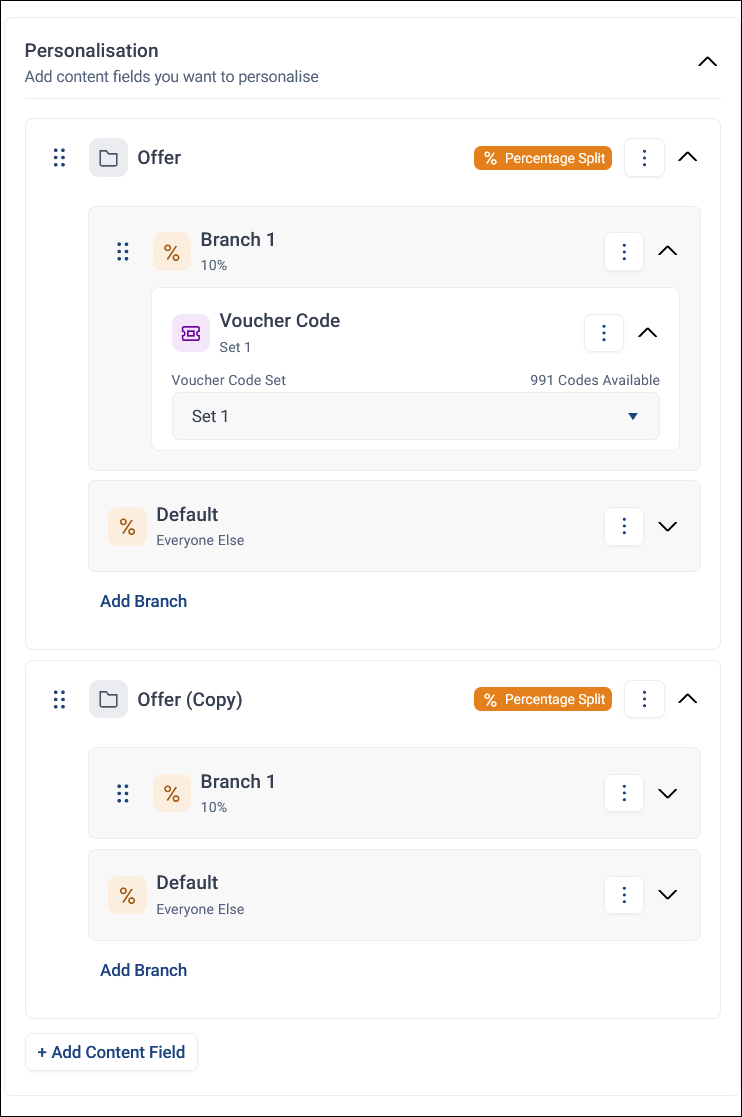
Duplicate a content field to save time when you need several similar fields, including any splits and branches it contains.
To duplicate a content field:
- Expand the option menu next to the content field.
-
Select Duplicate.
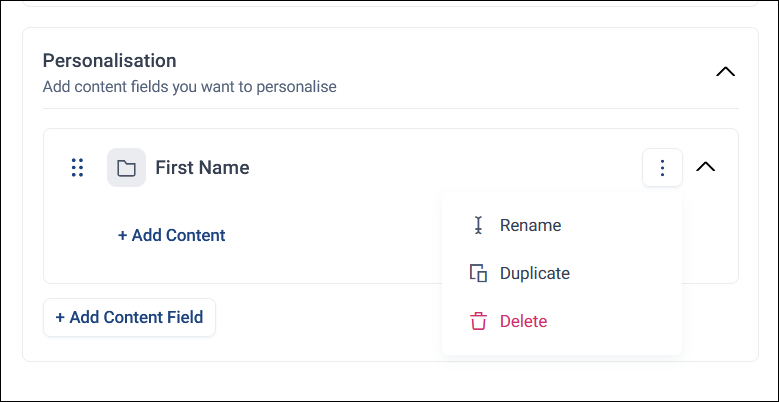
Orbit adds the copy directly below the original, named after it with (Copy) added, and carries over all its settings, splits, and branches.
Note
If the duplicate's name conflicts with an existing field, you're prompted to change it.
Changing the format of a variable
You can change how variable data is presented in the output file.
- Select Formatting from the options menu next to the variable.
-
Choose a format from the dropdown. For text content, you can reformat data to uppercase, title case, or lower case, or leave it unformatted. This helps create uniformity when using the information in dynamic copy.
Note
Formatting options only apply to text content. Numeric content doesn't have formatting options, since case doesn't apply to numbers.
-
Optionally, blank any records flagged as
Unclassified. Orbit flags information that hasn't been collected for a variable asUnclassifiedby default, which otherwise appears in the output file. - Select Apply.