Skip to content

Apteco Insider Programme

The Apteco Insider Programme gives you early access to upcoming features and the opportunity to shape Apteco product development.

Once you've joined, you'll receive regular updates about new preview features and opportunities to participate in early testing.

JOIN NOW

How to turn on preview features

To turn on a preview feature in Orbit:

  1. Click your avatar icon in the top-right corner.
  2. Select Application Settings.
  3. Click Preview Features in the left-hand menu.
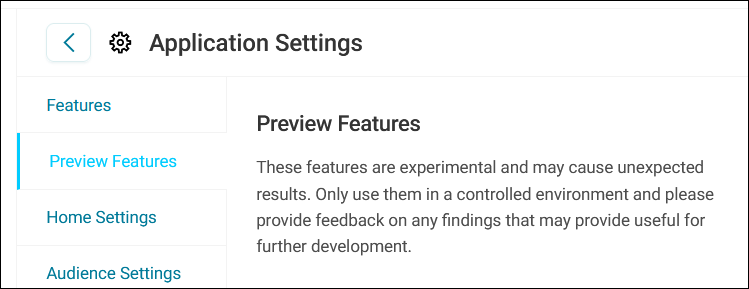
  4. Toggle on the feature you want to use.

  5. Click Save.

The feature is now active in your Orbit environment.

Available preview features

The following features are currently available to Apteco Insider Programme members.

Custom variables

Note

Your administrator must enable Custom Variables, Custom Variables Import Data, and Edit Custom Variable in Preview Features before you can use this.

Create new data variables of your own, starting with Upload data — the ability to append new data onto your existing records.

Enrich your view of the customer record by uploading additional data. This could be data you only need temporarily, for analysis or campaigning, or a feed that isn't part of your system yet but could be in future. Why wait to use it, when you can upload it and use it alongside your regular data straight away.

Custom Variables list, showing variables and their type, usage, and edit history

Upload a CSV or TXT file by matching on an attribute common to the file and your existing data in Orbit, such as URN, or email address. Bring in multiple columns in one go, creating separate custom variables which you can then use in audiences, dashboards, and campaigns.

You can:

  • Create a variable from a file — choose a key column to match rows to your records, pick which columns to upload, and set each one's type
  • Save it straight into a new folder, created as part of the same process, rather than only choosing from existing ones
  • Edit an uploaded data variable after creation, without needing to recreate it
  • Manage it alongside every other custom variable in the Resources area — search, filter, sort, refresh, archive, restore, and delete

For more detail, see Custom variables and Upload data.