Scheduling an export
Instead of exporting an audience manually every time, you can schedule an export to run once in the future, or repeat on a daily, weekly, monthly, or other recurring basis.
Note
To schedule an export, your organisation must have the Analyser bundle or above.
Scheduling is available for the File Server and FTP delivery types only.
Set up a scheduled export
- In your audience, click + New Page.
-
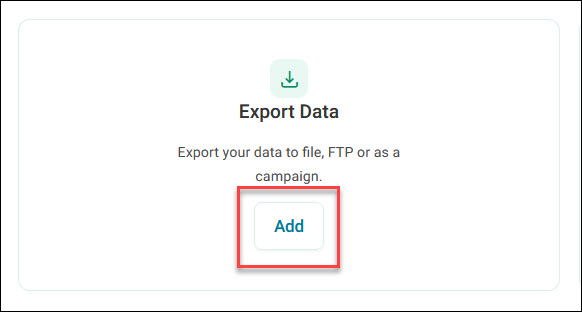
Under Export Data, click Add.
Note
You can also create a data grid to export using the Browse data solution. Both methods create the same kind of data grid.
-
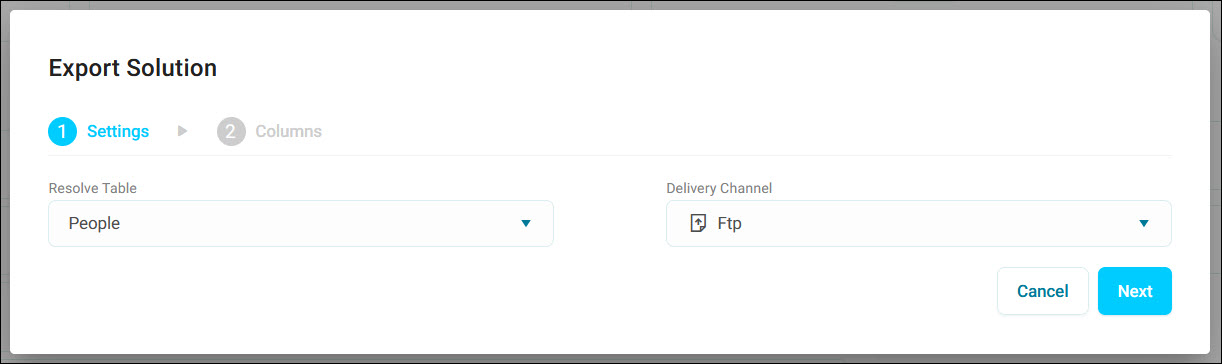
Choose the Resolve Table and Delivery Channel, either File Server or FTP, then click Next.
-
Choose your columns from the data variables, then click Add.
-
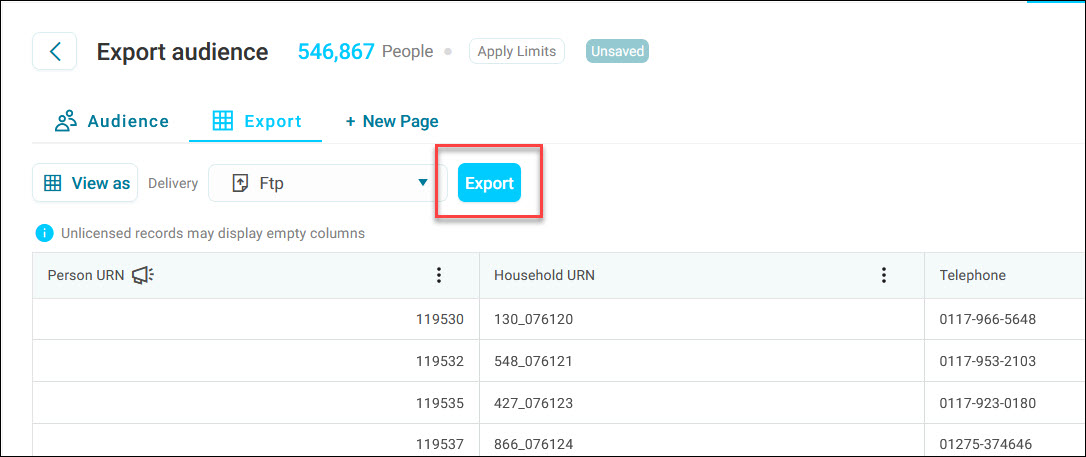
On the Export tab, make sure you have selected the correct channel in the Delivery drop down, then click Export.
-
In the Export Audience dialogue, set your Output Filename and Output type — CSV, XLSX, DBF, or URN.
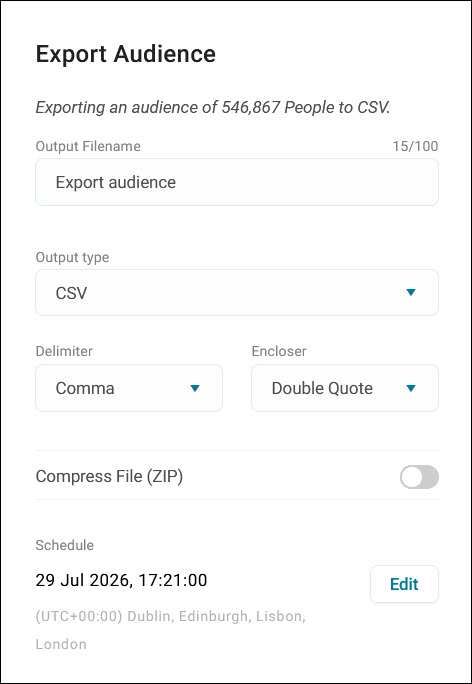
- If you chose CSV, tick Delimited File Options to set a delimiter and encloser. See Configure CSV export options.
- Optionally, tick Compress File (ZIP) and set a Zip password. See Export options.
-
Under Schedule, click Edit.
-
In the Schedule Export dialogue, select Specific Time under Publish.
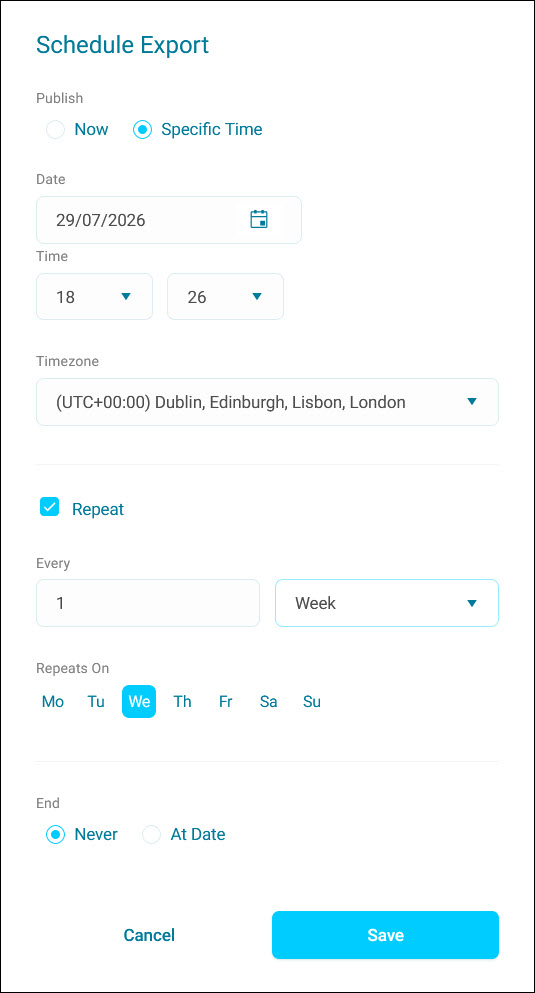
- Choose a Date, Time, and Timezone.
- Tick Repeat to make the export recur, then set how often it repeats (for example, every 1 Week) and, for a weekly schedule, which days it Repeats On.
- Under End, choose Never or At Date.
-
Click Save.
-
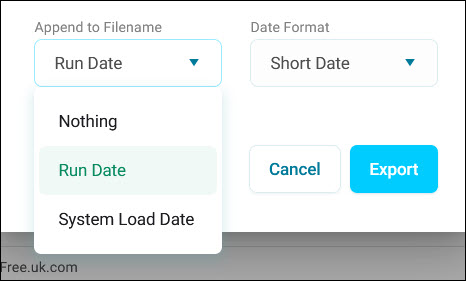
Optionally, choose to Append to Filename by Run Date or System Load Date and pick a Date Format.
Note
The user-defined custom date format available for scheduled tasks in FastStats (see User-defined appended date formatting) isn't available for Orbit scheduled exports yet.
-
Click Export.
Note
Scheduling for Now runs the export once and doesn't create a scheduled task. Choosing Specific Time creates a scheduled task — recurring if you tick Repeat, or a single future run otherwise — that stays in place until you delete it.
View schedule status
Once you've set up a scheduled export, a Scheduled Export indicator appears next to the Export button, with an edit (pencil) icon beside it.
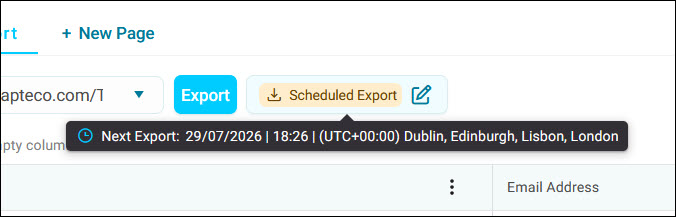
Hover over the indicator to see the next scheduled run or whether the last run succeeded or failed.
You can only have one scheduled export per audience. If a scheduled export already exists, click the edit (pencil) icon next to it to change it, rather than trying to set up a new one.
Tip
Audiences with a scheduled export are also flagged in the main Audiences list, so you can spot them without opening each one.
Note
Unlike scheduling in FastStats, a scheduled export doesn't run against a frozen copy of the audience. Each run always uses the latest saved version, so save any changes before the next scheduled run to make sure they're picked up.
Edit a scheduled export
To change a scheduled export:
- Click the edit (pencil) icon next to the Scheduled Export indicator.
-
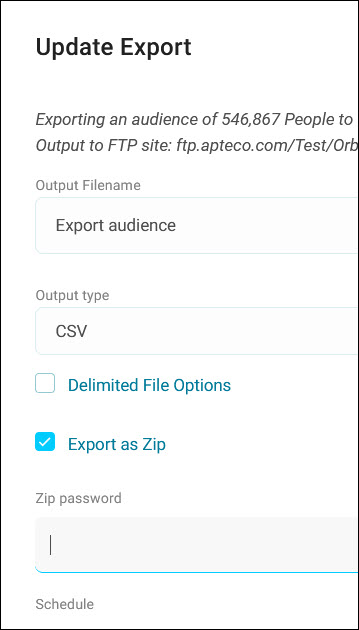
Update the destination, schedule, or export options as required.
-
Click Update.
Run a one-off export without changing your schedule
If an audience already has a recurring scheduled export configured, clicking Export with the schedule left at Now runs a one-off copy using the saved settings. It doesn't overwrite or cancel the existing recurring schedule.
Delete a scheduled export
- Click the edit (pencil) icon next to the Scheduled Export indicator.
- Click Delete.
- Confirm the deletion.
Once deleted, the scheduled task stops running and can't be recovered. Set up a new schedule if you need one again.
Note
Deleting the audience itself also deletes any scheduled export associated with it.
URN files
In addition to choosing URN as your output type, you can tick a checkbox to output a separate URN file alongside your main scheduled File Server export (for example, alongside a CSV).
Note
This option isn't currently available for scheduled FTP exports. Support is planned for a future release.
Permissions
To schedule an export, you need permission to Export the data you're exporting, plus access to the File Server or FTP delivery channel you want to use.
See Permissions.