Using audiences
The Audiences screen lists all your audiences, with tools to find, organise, and manage them.
Grid and list view
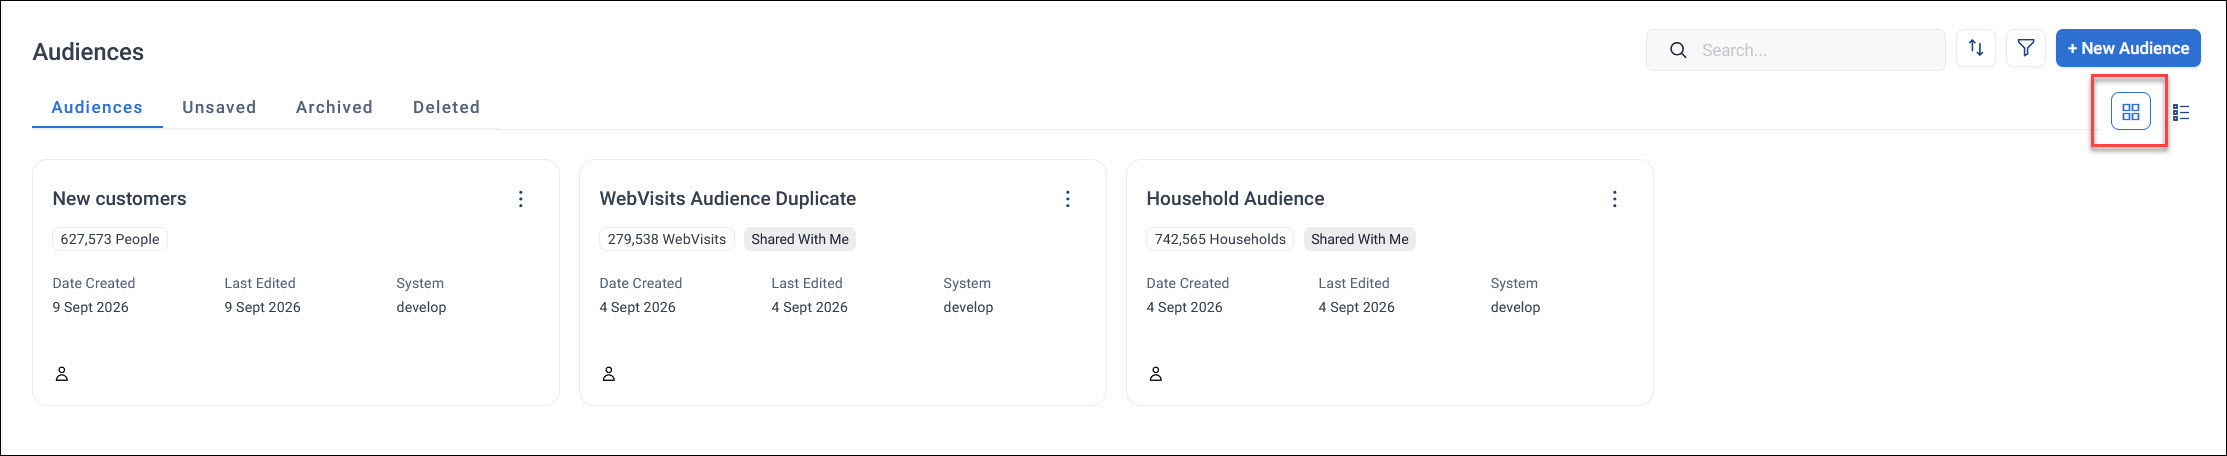
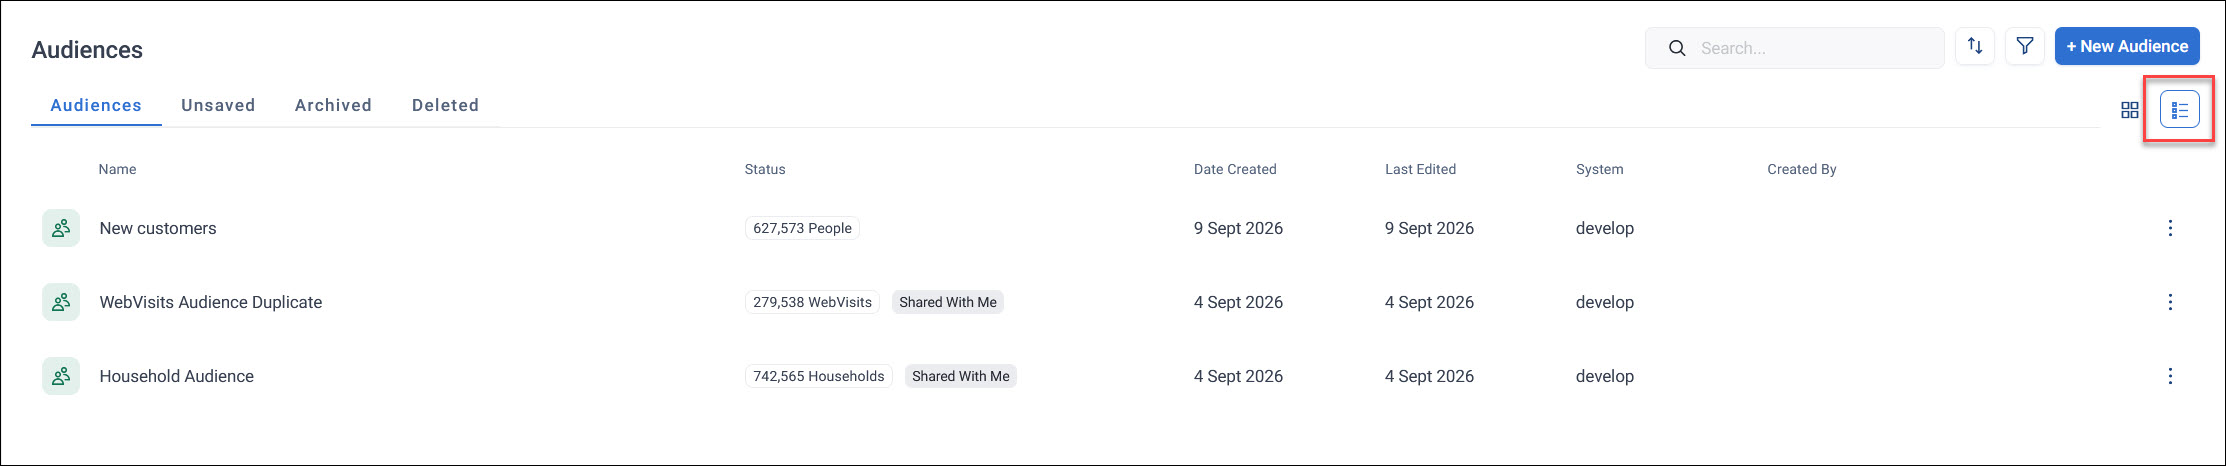
Use the grid and list view icons in the top right to switch between a grid view and a list view of your audiences.
Note
Orbit remembers your choice the next time you visit the Audiences screen.
Grid view displays each audience as a card. Each card shows its name, record count and table level, such as "279,538 WebVisits". It also shows status such as Shared With Me, creation and last-edited dates, and the creator.
List view shows the same audiences as table rows instead. It adds a Created By column, so you can see who created each audience without opening it.
Search, sort, and filter your audiences
Use the controls in the top right of the Audiences screen to find the audience you want:
- Search: enter a keyword to filter the list by audience name
-
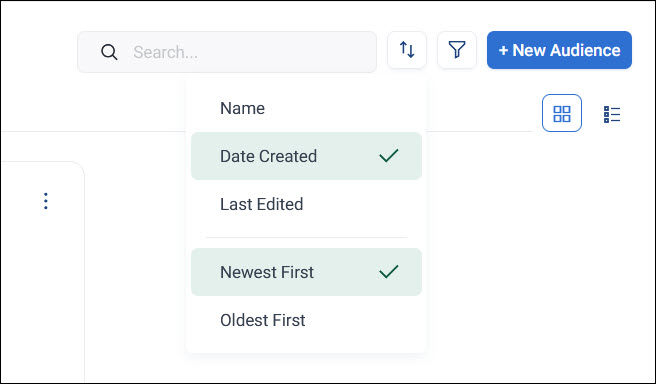
Sort: click the sort icon to order your audiences by Name, Date Created, or Last Edited, in either Newest First or Oldest First order
Note
Orbit remembers your last sort order the next time you visit the Audiences screen.
-
Filter: click the filter icon to narrow the list down by shared status, audience type, or creation date
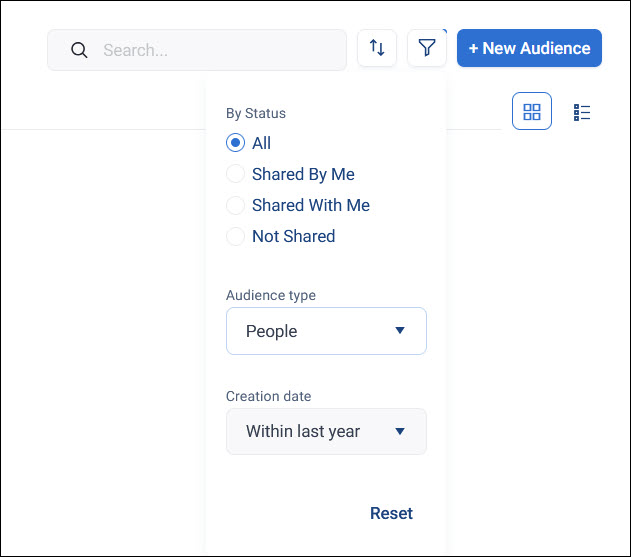
Status options are All, Shared By Me, Shared With Me, or Not Shared. Click Reset to clear your filters.
Audiences load as you scroll, so you don't need to page through your full list to find what you're looking for.
Select multiple audiences
Click a checkbox on an audience to enter multi-select mode. With multi-select mode active, click any other audience to add it to your selection.
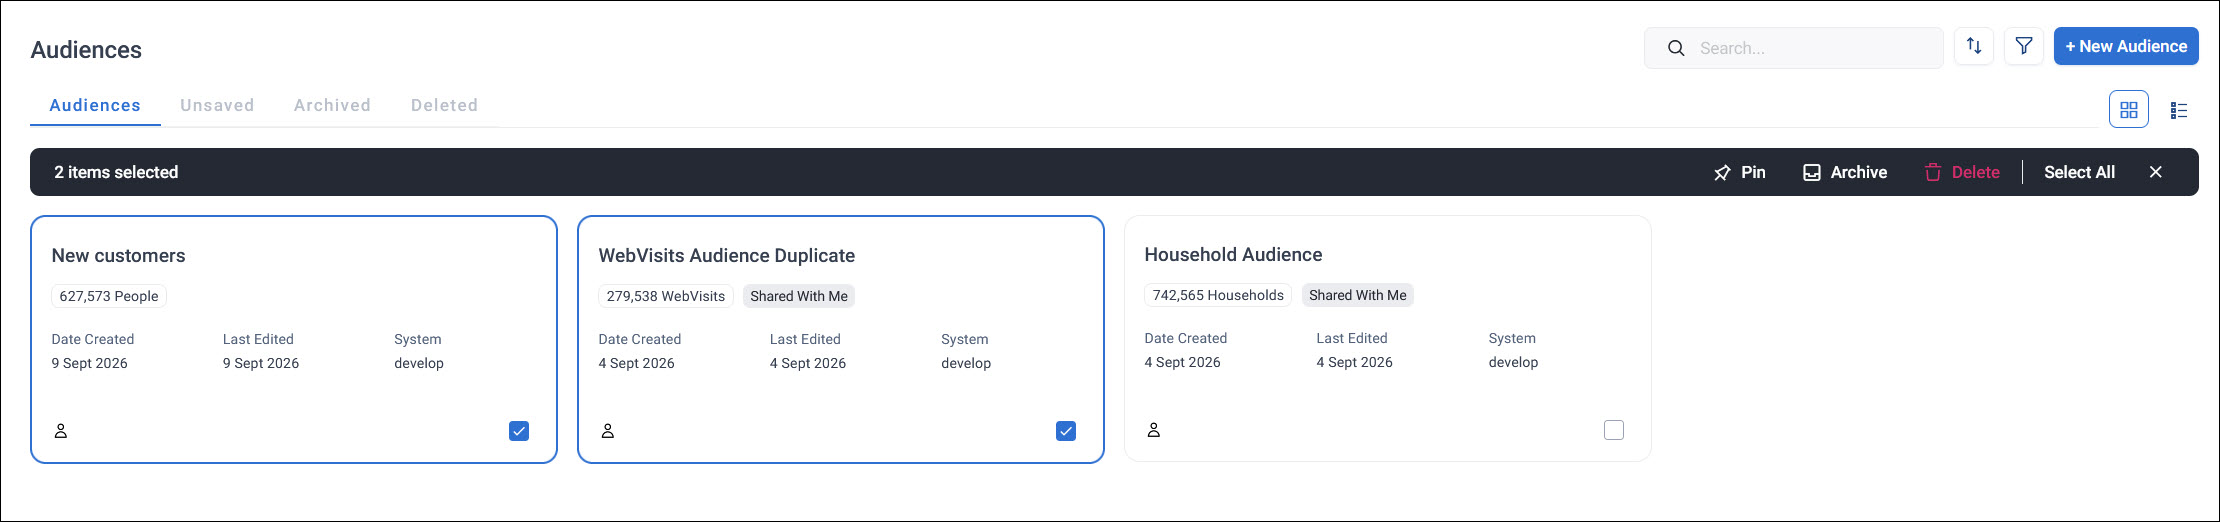
Once you've selected one or more audiences, use the toolbar that appears to:
- Pin the selected audiences
- Archive the selected audiences
- Delete the selected audiences
Click Select All to select every audience in the current view, or click the close icon to exit multi-select mode.
Manage an audience from the Audiences screen
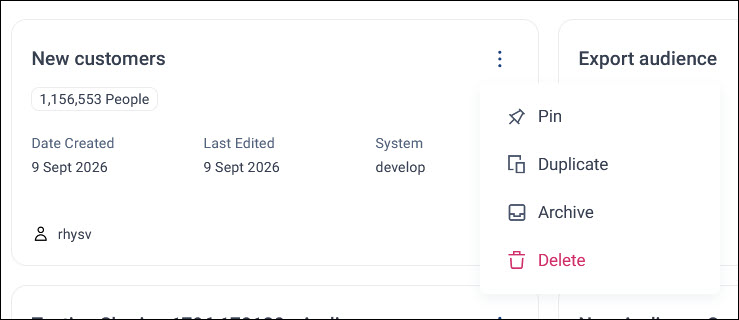
Click the options menu on an audience to:
- Pin: keep it near the top of your list
- Duplicate: create an instant copy of the audience
- Archive: move it to the Archived tab
- Delete: move it to the Deleted tab
To restore an archived audience, go to the Archived tab, click its options menu, and click Restore.
To restore a deleted audience, go to the Deleted tab, click its options menu, and click Restore.
Audiences you haven't saved yet appear in the Unsaved tab.