Data dictionary
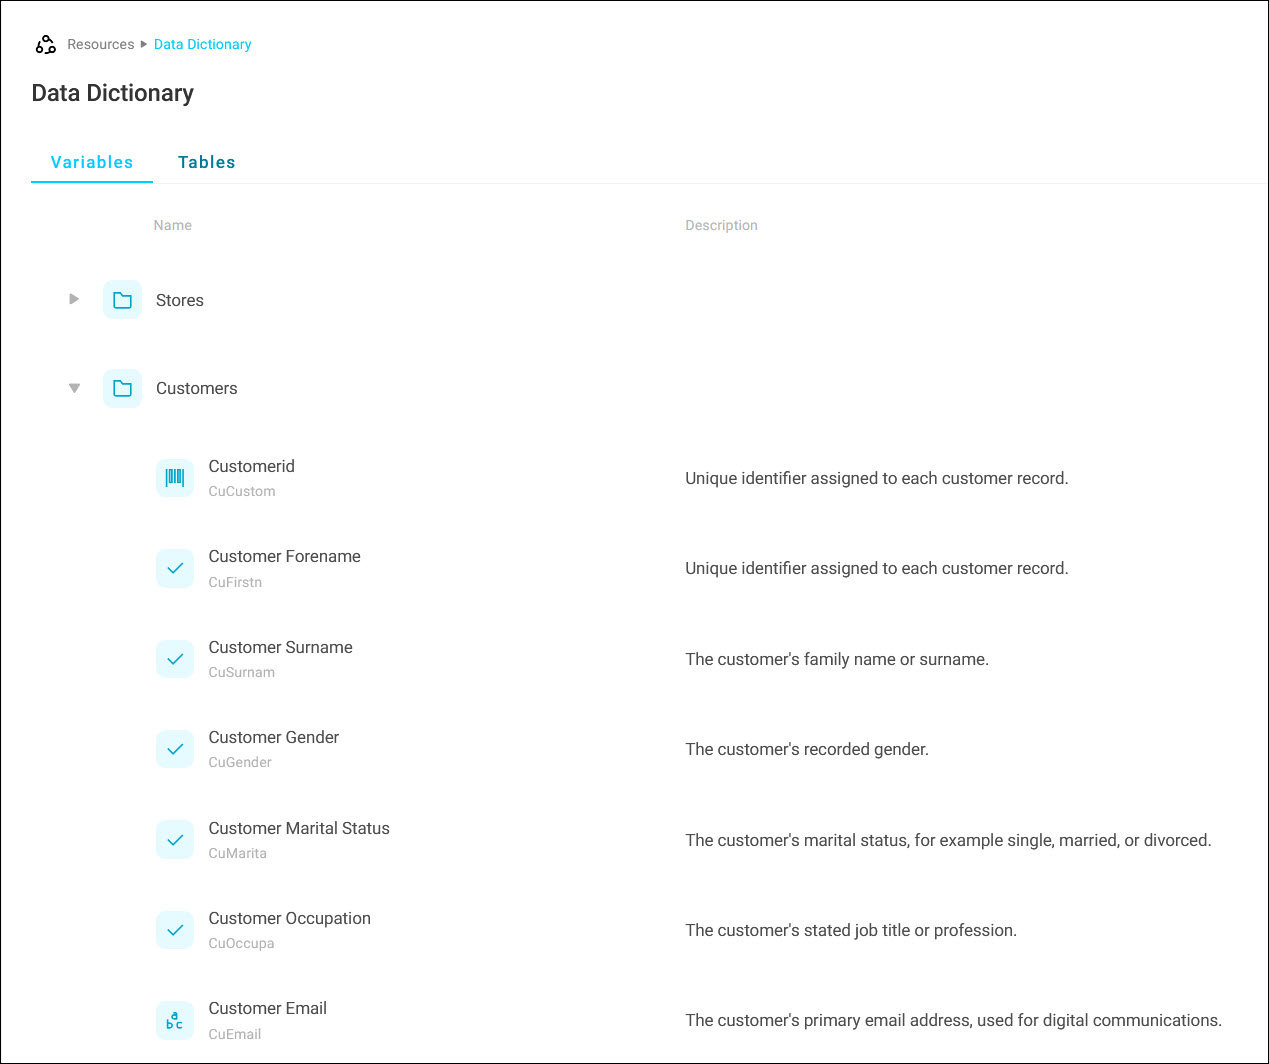
The data dictionary is a centralised place to document the variables, tables, and folders in your Orbit system.
Clear descriptions help your team understand the exact context, formatting, and intent of your data. The Orin AI assistant uses them too, to make better suggestions when creating items in Orbit.
The data dictionary starts pre-populated with any existing variable notes. Keep it up to date in two ways:
- Editing individual descriptions directly in Orbit
- Importing a delimited file for bulk changes
Note
Orbit saves every edit to your data dictionary, but it doesn't currently let you view or revert previous versions of a description. To undo a change, edit the description again or restore it from your own records.
Example
A variable named CuMarita isn't self-explanatory to a new analyst. Add the description "The customer's marital status, for example single, married, or divorced" to the data dictionary.
Access the data dictionary
To open the data dictionary:
- Select the Account and settings icon in the top-right corner.
- Select Resources.
- Select Data Dictionary.
Manage variables and tables manually
To update a few definitions, edit them directly:
- Select the Variables or Tables tab, depending on what you want to update.
- Select the arrow next to a folder to expand its contents.
-
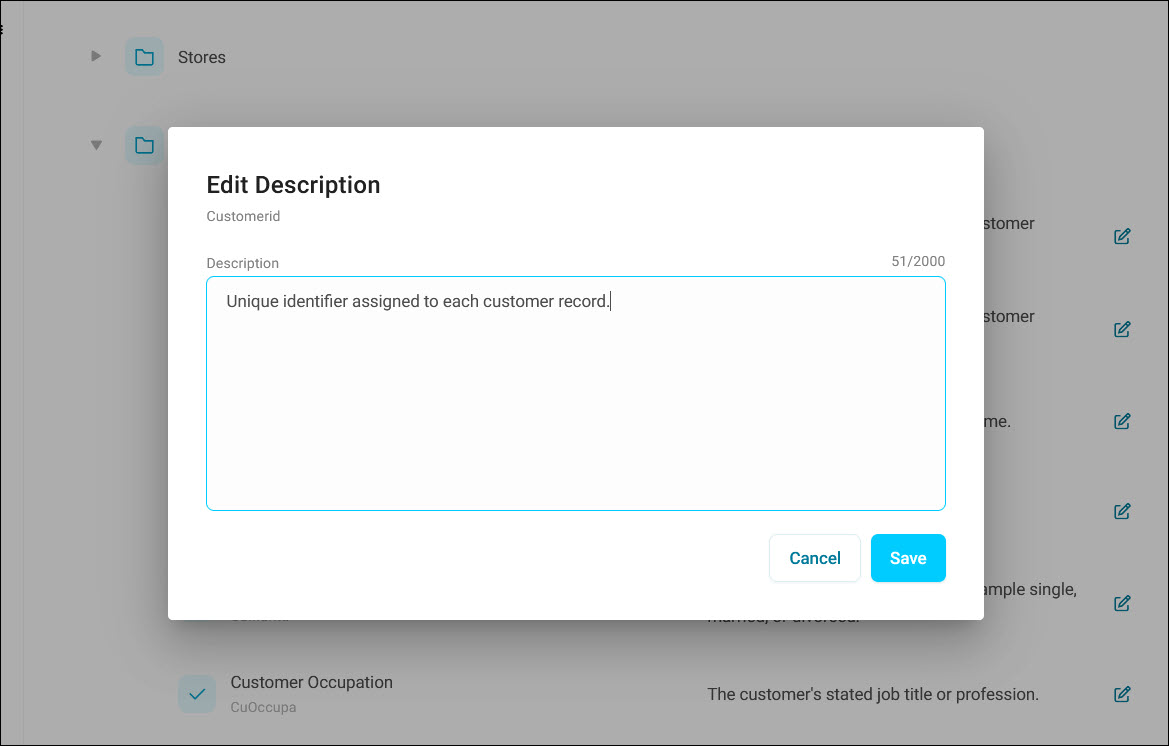
Find the item you want to update and select the edit (pencil) icon.
-
Enter your description, up to a maximum of 2000 characters.
- Select Save. The description updates immediately.
Tip
To remove a description, select the edit icon, clear the text box, and select Save.
Search and filter
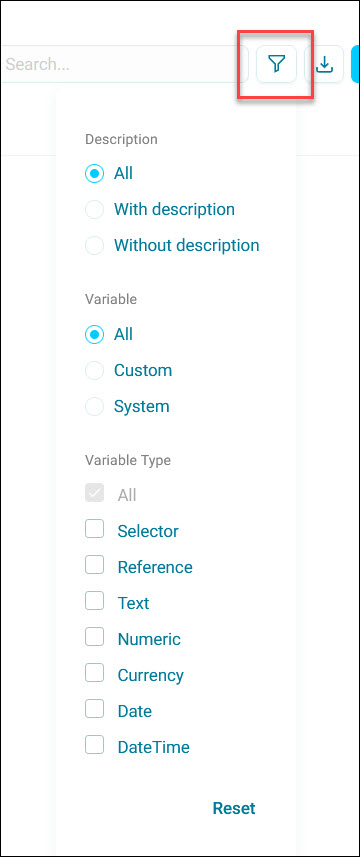
To find entries in a large system, search or filter by:
- Whether an item has a description: All, With description, or Without description
- Variable scope: All, Custom, or System
- Variable type: Selector, Reference, Text, Numeric, Currency, Date, or DateTime
Note
On the Tables tab, the description filter is available, but variable scope and variable type don't apply.
Matching results stay within the folder hierarchy, so you can see where each item sits. Select Reset to clear your filters.
Bulk updates with export and import
For large-scale updates, export your current data dictionary and add your descriptions in a spreadsheet or text editor. Then import the completed file back into Orbit.
Export
- Select the export icon next to Upload Descriptions.
-
Choose your export options:
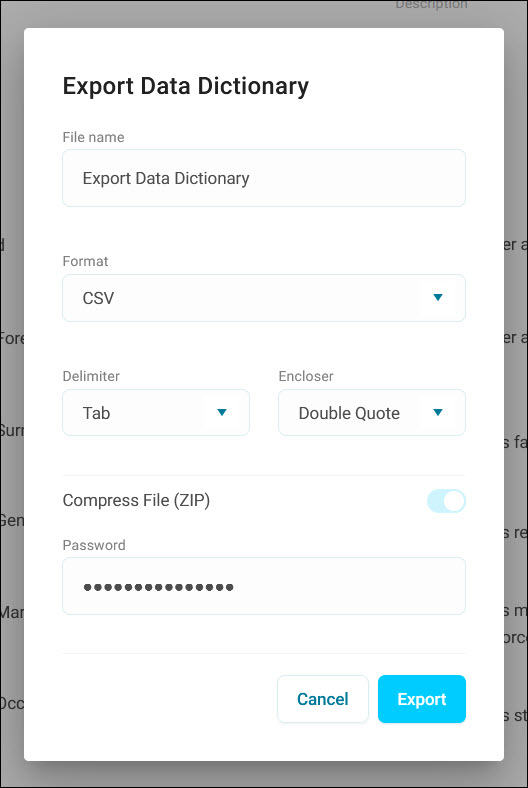
- File name: enter a descriptive name, for example
Export Data Dictionary. - Format:
CSV,TXT, orXLSX - Delimiter: Comma, Tab, Semicolon, Pipe, or Other
- Encloser: Double Quote, Single Quote, None, or Other
- Toggle Compress File (ZIP) if you want the export as a password-protected ZIP file. If enabled, enter a Password to protect the file.
- File name: enter a descriptive name, for example
-
Select Export.
This downloads a file listing every variable, table, and folder in your system. Add or edit descriptions in any text editor or spreadsheet app.
Import
Tip
Your descriptions might contain the same character you're using as a delimiter, for example commas in a comma-delimited file. In that case, use a text encloser (such as double quotes) around those values, or Orbit reads the extra characters as column breaks.
- Select Upload Descriptions.
- Select Select File, then choose your file.
-
Map the Name and Description fields to the matching columns in your file.
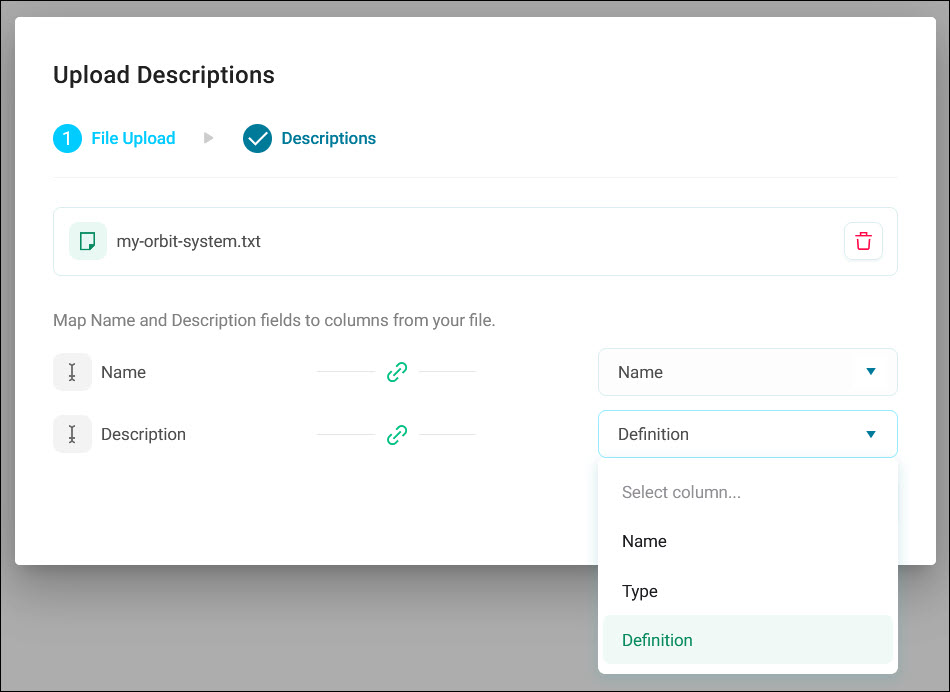
The column list reflects the headers in your uploaded file, so the options you see depend on your own system and file.
-
Select Next.
Review and confirm the import
Before you confirm the import, Orbit opens a preview so you can check the changes:
- Select the filter icon to show only Matched or Unmatched rows.
- Use the search bar to find items and confirm their description is correct.
-
Unmatched items display an Unmatched label. Use the drop-down list to map them manually, or delete them from the import using the delete (bin) icon.
Note
You can add a deleted row back with + Add Description.
-
Confirm parent and child items line up correctly.
Select Upload to confirm. The data dictionary refreshes immediately with your imported descriptions.