Setting up Apteco Email webhooks for responses
Note
For general setup and configuration documentation for Apteco Email, see Apteco Email.
The Apteco Email webhook process works as follows:
- Apteco Email sends response events as JSON to the webhook.
- Responses stream to a file in your temporary directory named
AptecoEmail_yyyyMMdd@HHmm.txt(a new file each minute). - Every minute, the system parses the previous files and inserts responses into your response database (RS_). Errors go to a
.errfile, with a new error file created each day.
Set up the Orbit Updater Configurator
The OrbitResponsesAPI web application resides on your web server alongside the OrbitAPI. It exists within IIS and has its own configured application pool.
- Log on to your web server.
- Go to your Orbit Updater directory:
C:\Program Files (x86)\Apteco\FastStats Orbit Updater. - Run
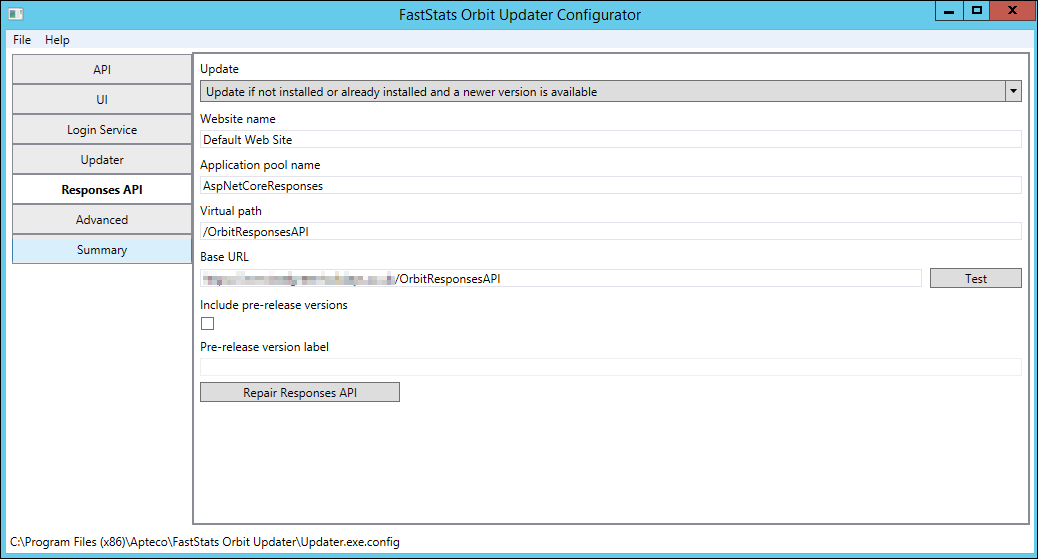
UpdaterConfigurator.exeby right-clicking and choosing Run As Administrator. - Select ResponsesAPI from the right-hand side.
- Change the Update option to Update if not installed or already installed and a newer version is available.
-
Select File > Save.
Check the new application pool
- Open Windows Services (search for "Services" in the Windows search pane).
- Find and highlight FastStats Orbit Updater, then right-click and Restart the service.
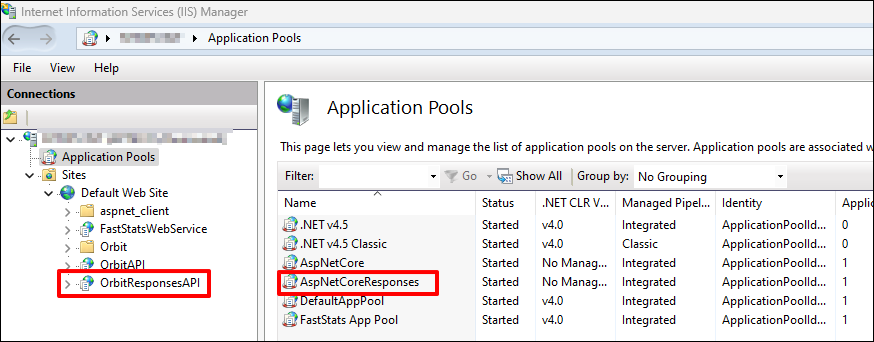
- Open IIS from the Windows search pane.
-
Confirm the Orbit Updater has installed the OrbitResponsesAPI and a new application pool called AspNetCoreResponses.
Configure the Orbit Responses API
Note
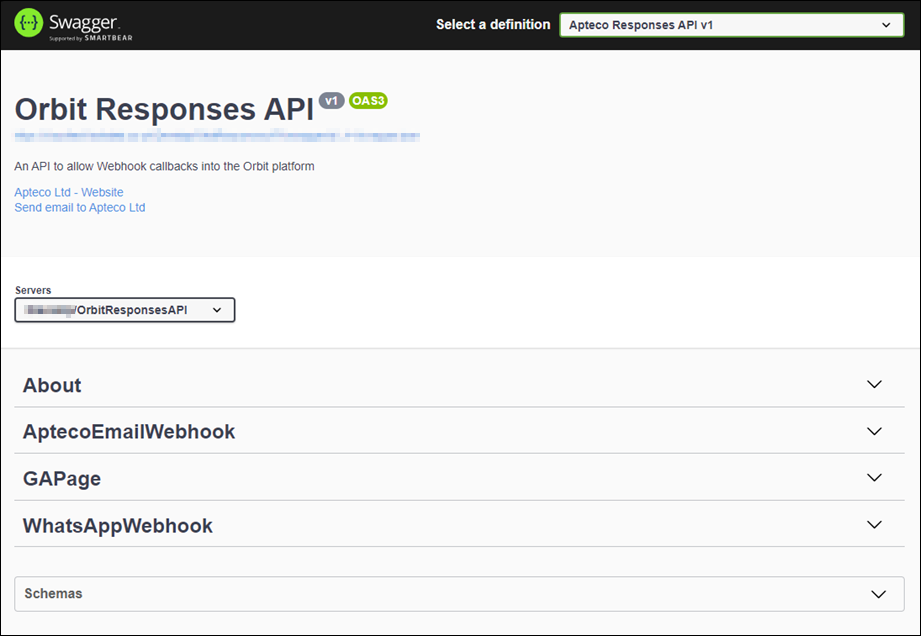
Make sure you have access to the OrbitResponses API. Verify using Swagger.
Add the following configuration to your appsettings.json file for the OrbitResponsesAPI:
"AptecoEmail": {
  "ConnectionString": "user id=faststats_service;password=xxx;initial catalog=RS_Develop;data source=192.0.2.1;pooling=true;max pool size=10000;",
  "ApiKey": "xxx",
  "ApiSecret": "xxx",
  "UrnField": "urn",
  "BaseUrl": "https://apteco-email.integrations.apteco.com/",
  "ResponsePath": "C:\\temp\\Orbit\\Responses\\AptecoEmailResponses\\Test"
}
Where:
ConnectionString: points to your response database (RS_)UrnField: set to what you have called your Person Unique Reference Number (URN) in your system (its description, not its reference, in lowercase)BaseUrl: the address of the Apteco Email integration serverResponsePath: the temporary working folder on the server to download responses to before inserting them; must be reachable by SQL Server
Navigate to https://[your-server]/OrbitResponsesAPI/swagger/ui/index.html:
Get the webhook URL
-
In Swagger, find the AptecoEmailWebhook section to find the webhook URL.

-
Try out the example data and confirm the request URL shown.

-
Provide this webhook URL to the Apteco Technical Services team, who will liaise with the Apteco Business Development team to configure all your response types.
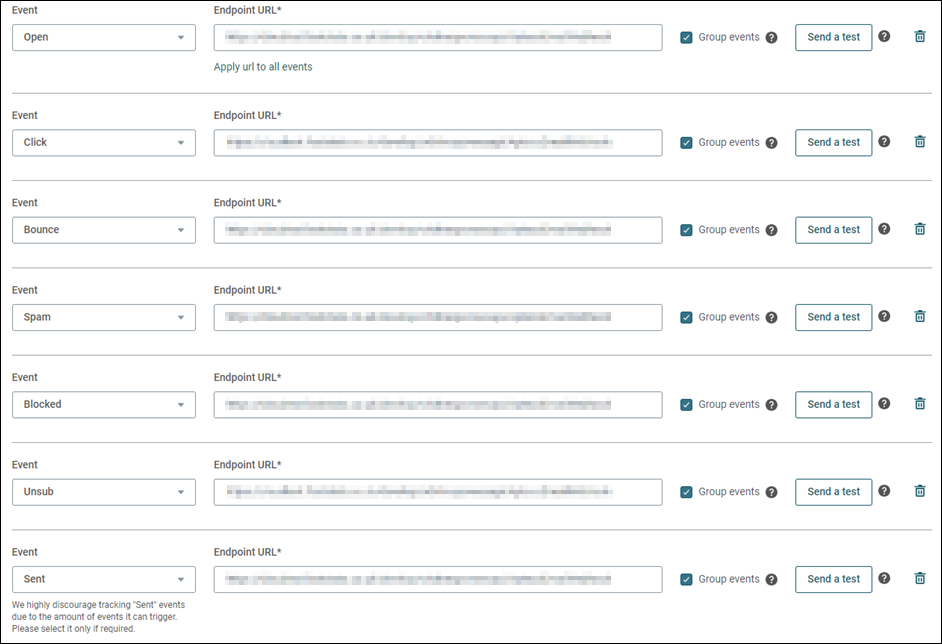
You can now send emails through Apteco Email and start picking up your response events.