Message objectives
Message objectives allow you to define interaction criteria for a message to aim to achieve within a campaign and track their performance in real-time. By setting objectives, you can monitor if messages achieve their intended actions—like registrations, purchases, or app downloads—and assess their contribution to any broader Campaign goals.
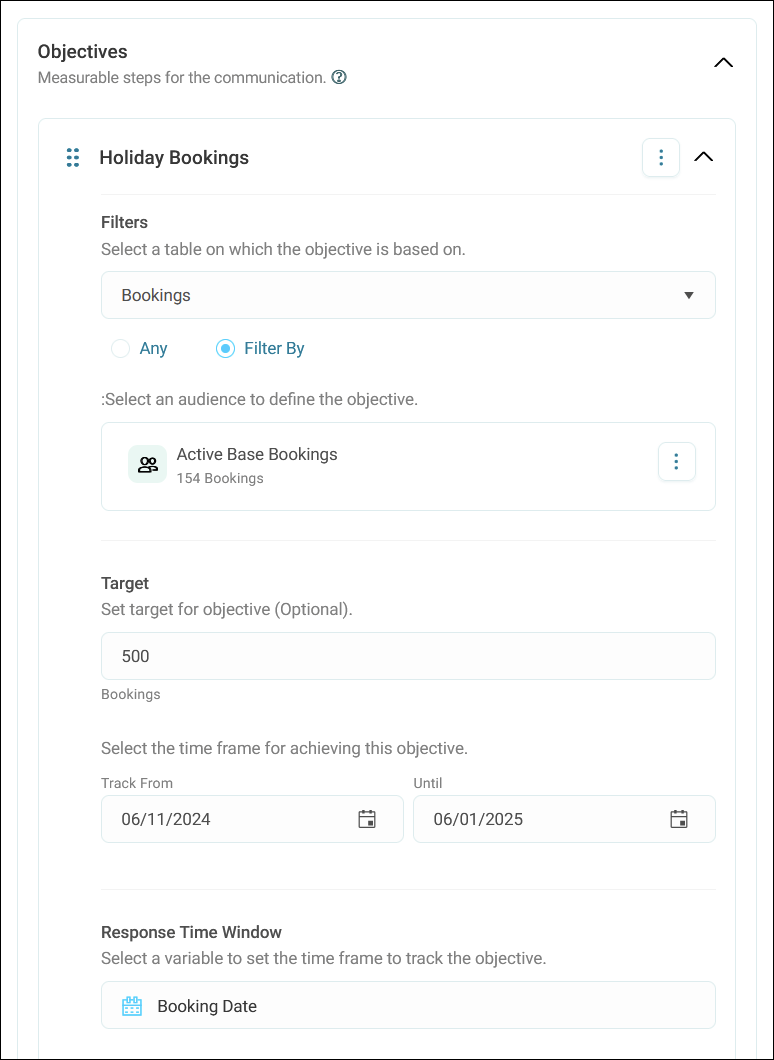
Key benefits of message objectives include:
- Automatic tracking: Monitor responses and actions for each message.
- Multiple calls to action: Track several objectives within a single message.
- Revenue tracking: Measure financial impact from responses.
- Flexible data sources: Use various data tables for comprehensive tracking.
Note
This feature is available with a Campaigner bundle and above.
Example use cases
New product launch
Track the impact of your product launch campaign by setting objectives for actions such as event registrations, app downloads, or first-time purchases. By setting targets, you can monitor the effectiveness of each message in driving engagement.
- Seasonal promotions: Define objectives for response rates to seasonal offers. Track purchases, sign-ups for referral programs, or survey completions to measure customer engagement with promotional content.
- Retention campaigns: Set objectives to re-engage lapsed customers. Track loyalty program enrolments, repeat purchases, or content views to gauge the success of retention efforts.
- Cross-sell/Up-sell opportunities: Measure the effectiveness of messages intended to drive cross-sells or up-sells. Define objectives for purchases of specific product categories or upgrades based on customer purchase history.
Creating an objective
To begin tracking responses to specific messages, we need to set up an objective in the journey builder. You can select the relevant data and set a measurable target so you can monitor your campaign messaging success.
Once set up, any message step with an objective displays a trophy icon.
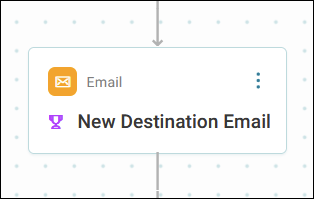
To begin setting up your objective:
-
In your campaign journey, go to the message step you want to set an objective for.
Note
Each message can have multiple objectives, allowing you to track different actions related to a single communication. See Tracking multiple objectives for a message.
-
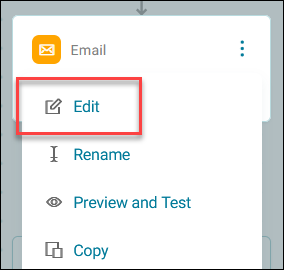
Click the option menu on the message step, then click Edit.
- In the side panel under Objectives, click + Add Objective.
-
Give your objective a descriptive name that reflects the action or outcome you wish to track.
Example
If the goal is to drive holiday bookings for a new destination, you could name it ‘Holiday Bookings’.
-
Choose the data table that best represents the action you're tracking. This table will serve as the source of responses for the objective.
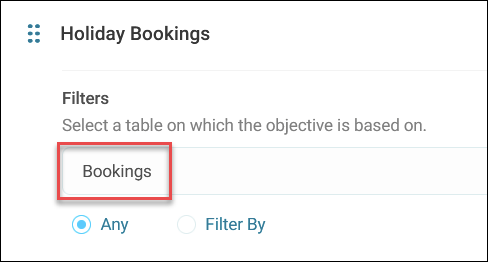
Common options include tables for orders, event registrations, or website interactions.
-
If you want to narrow the objective to specific criteria within the data table, add a filter.
Example
If your objective is to track mobile orders, apply a filter to show only transactions for mobile products. This allows you to refine objectives to match the precise actions you're looking to track.
-
Click Filter by, then click + Add Audience.
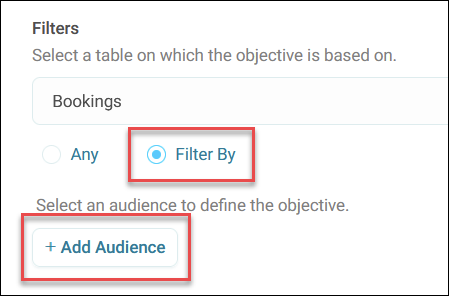
You can now select an audience to filter by.
You've now set up the basis of your objective. The next step is to define a target.
Defining a target for the objective
Defining a target helps you measure progress toward your objective. You can see if you're on track to meet your overall campaign goal.
To define an objective target:
-
Enter the specific number you aim to achieve for this objective.
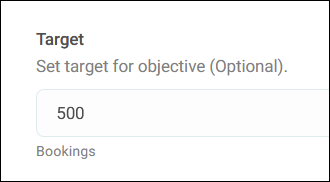
For example, if you're hoping for 500 holiday bookings, enter 500 as your target. This sets a clear benchmark to measure against.
-
Select a timeframe for the target.
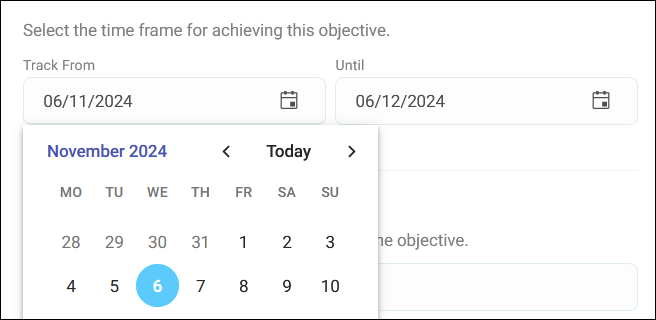
This period allows you to check if the objective is progressing as expected. For instance, you might want to hit your target within a month of launching the message.
Note
Your objective target timeframe must be valid. If it’s not, you’re prompted to change the timeframe.
Now that you’ve defined your objective and target, you can set your response time window for the message.
Response time window
When setting up your campaign objectives, it’s essential to understand the differences between campaign goals, objective targets, and response time windows.
- Campaign goals represent the overall aim of your campaign.
- Objective target timeframes are the time-based outcomes you set for measuring progress toward your campaign objectives. For instance, if you aim to achieve 1,000 registrations in two months, that two-month window is your target timeframe. It provides an overarching benchmark to assess your campaign’s progress.
- Response time windows, in contrast, are specific to individual recipients. This setting defines how long Orbit should track responses from the moment each person receives the campaign message. This is especially useful for recurring or staggered campaigns where recipients may engage at different times.
Together, these provide a comprehensive framework for tracking campaign success and allow you to measure both total progress and individual response timing.
Example use cases
-
One-time promotion: You’re running a one-off campaign for a holiday sale. Set a response time window of 10 days, as most responses are likely to occur during the sale period.
-
Event registration campaign: For a webinar invite sent out a month before the event, set a response time window of 3–4 weeks to capture late sign-ups, allowing for responses right up to the event date.
-
Recurring birthday campaign: For a birthday campaign where messages are sent daily to eligible recipients, each individual’s response window begins on their birthday and might last two weeks. This approach tracks each recipient’s engagement while maintaining the campaign’s recurring nature.
Setting up the response time window
To set up the response time window:
-
In your campaign objective side panel, locate the response time window section.
This is where you specify how long Orbit should track each recipient's responses.
-
For the response attribution, you must select a variable to set the time frame to track the objective.
Click + Add Variable and select a variable from the list.
For example, if your objective is related to bookings, you might consider the Booking Date variable.
-
Select the length of time you want to track responses from the moment each recipient receives the message.
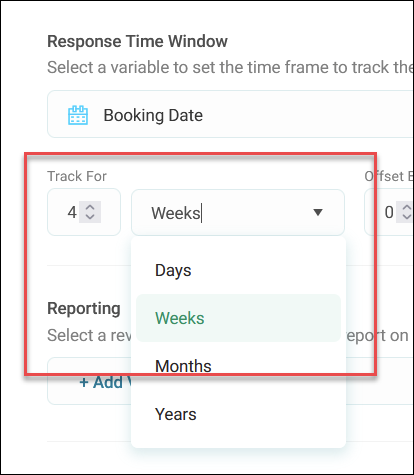
You can choose from a number of days, weeks, months, or years, depending on the campaign's needs.
Example
For a limited-time offer email campaign, you might set the response time window to two weeks if that’s the anticipated period for recipients to act on the offer.
Tip
Consider your campaign type.
- One-off campaigns: For a one-time email or event invitation, set a shorter response time window that matches the expected engagement period, such as 7 days for an email with a time-sensitive promotion.
- Recurring or ongoing campaigns: If your campaign sends messages on a recurring basis (e.g., weekly emails or birthday campaigns), the response time window ensures that responses are tracked for each recipient individually, from when they receive the message.
-
Adjust for a delayed message delivery (optional).
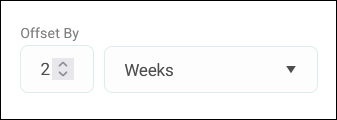
Set the Offset By option the same way you did in step 3.
You have now set up your response time window. You can now also set up your revenue reporting.
Monitoring responses
Once you have set the response time window for your objective, Orbit automatically tracks responses within the specified timeframe for each recipient. Progress updates in real time, and you can view the results in the campaign strategy side panel to monitor how responses align with your campaign’s goals and target timeframe.
Revenue reporting
Revenue reporting allows you to track the financial impact of a campaign objective by using a revenue variable. This setting lets Orbit calculate the total revenue generated from specific responses.
To set up revenue reporting:
- In the objective side panel, locate the Reporting section.
- Click + Add Variable.
-
Select a revenue variable from the dropdown list.
This variable represents the financial metric you want to track, such as Profit. Make sure to select a variable that aligns with your campaign’s objectives and goal.
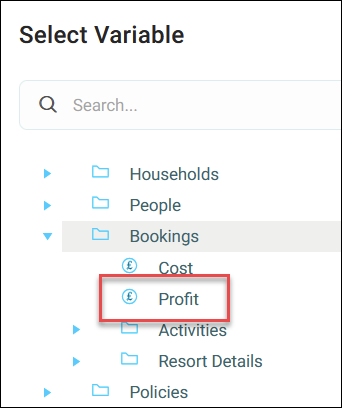
Once selected, Orbit will use the revenue variable to track the value generated from responses linked to this objective. Revenue data will update automatically as responses are received.
By setting a response time window and enabling revenue reporting, you can track your objectives precisely and measure the financial return on each campaign message.
Tracking multiple objectives for a message
Campaigns often include messages designed to drive several outcomes, such as event sign-ups, product purchases, and app downloads. You can track multiple objectives for a single message in Orbit. This allows you to monitor different types of responses from the same message, helping you evaluate each call to action individually.
Example use cases
Product launch campaign with pre-order and event registration
You’re launching a new product and want to engage your audience in two ways: encouraging pre-orders and promoting a virtual pre-launch event.
- Objective 1: Event registrations
Track how many people sign up for the pre-launch event. Set a target of 500 registrations to gauge interest in the event.
- Objective 2: Product pre-orders
Track pre-orders of the product directly from the campaign message. Set a target of 200 pre-orders within a four-week timeframe to estimate demand.
Cross-promotional campaign for donations and event attendance
Your campaign supports a charity with two primary calls to action: encouraging event attendance and raising donations. You want to understand the effectiveness of each call to action within the same message.
- Objective 1: Event sign-ups
Track registrations for an upcoming charity event. Set a target of 300 registrations to measure event engagement.
- Objective 2: Donation tracking
Track donations made from the campaign link. Set a target donation amount of £10,000 within a three-week window to evaluate the fundraising impact.
Adding an additional objective to a message
To add an additional objective:
- In your campaign journey, select a message step with an objective already applied.
-
Click the option menu, then click Edit.
-
In the side panel, click + Add Objective.
-
Create a new objective by following the steps in Creating an objective.
- You can continue adding as many objectives as necessary for your campaign.
You have now set up multiple objectives for your message.