Upload data
Upload data lets you enrich your existing records by appending new data from a CSV or TXT file. This means you don't have to wait for it to become part of your core data build.
This is useful for data you want to use right away, such as:
- Data events
- Data gathering
- Temporary analysis
- Campaign needs
- A feed that isn't yet part of your system
Rather than waiting for a full data build, upload it and use it alongside your regular data straight away.
Orbit matches your file to your existing records using a common attribute, such as Unique Reference Number (URN), mobile number, email, or postcode. Bring in multiple columns in one go. Each becomes its own custom variable, ready to use in Orbit.
Create a variable by uploading data
To create a custom variable from a file:
- Open Custom variables.
- Select + New Variable, then Upload Data.
Data source
Choose the Existing File or Upload File tab. Select a file you've used before, or upload a new one. Drag and drop your CSV or TXT file, or choose Select file to browse for it. You can delete your selected file and choose another at any point before moving on.
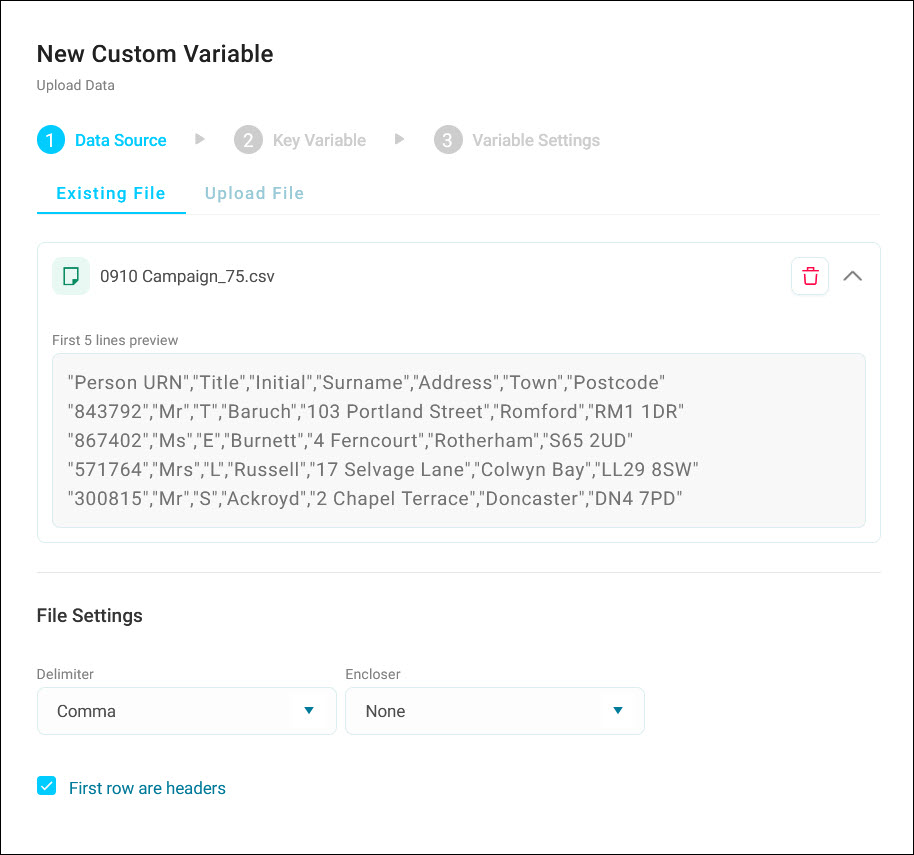
Configure your file settings:
- Delimiter: the character that separates your columns, such as a comma or tab.
- Encloser: the character that surrounds your values, such as double or single quotes.
- Toggle First row are headers if your file has a header row with column names.
Tip
Expand your file to see a 5-row preview of your data. If the preview looks wrong, check your delimiter and encloser settings.
Select Next.
Key variable
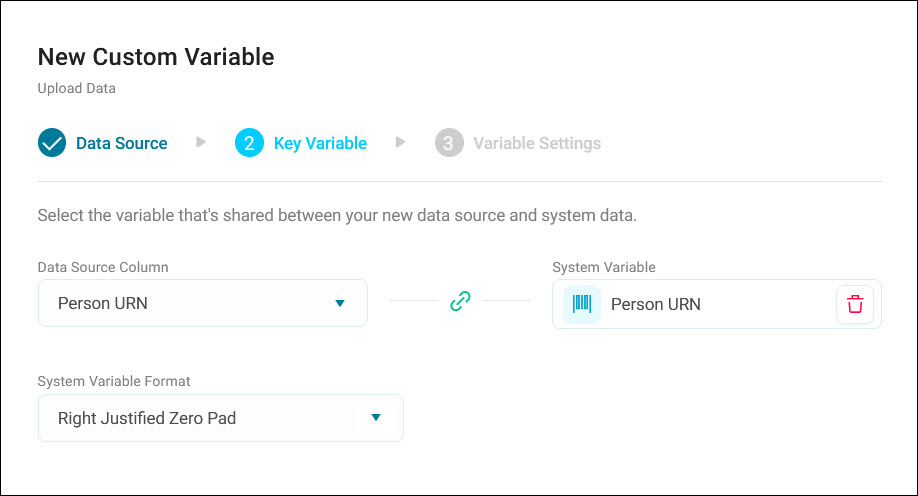
Under Data Source Column, choose the key column in your file. It should match a System Variable in your system, such as URN, mobile number, email, or postcode. Orbit uses this to match each row in your file to an existing record. Change the System Variable Format, then select Next.
Variable settings
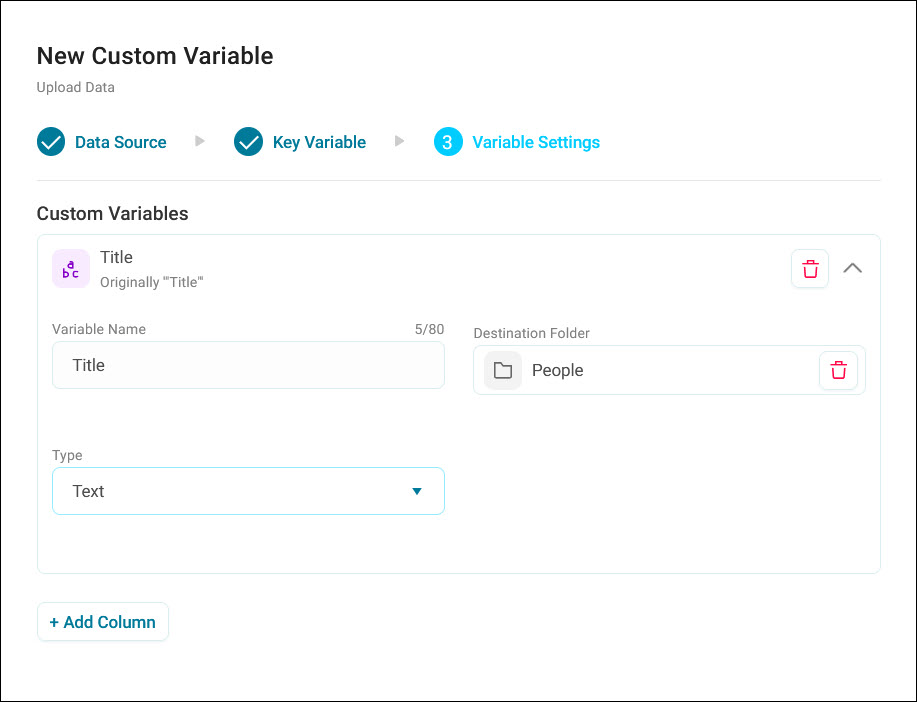
Select + Add Column for each column in your file you want to create as a custom variable. Orbit creates one variable per column.
Tip
Add multiple columns at once by selecting + Add Column, then choosing several from the list.
For each column, choose its variable Type and its settings:
- Text
- Numeric: choose Integer or Decimal. For Decimal, change the number of decimal places, up to 6.
- Selector: choose Automatic, or Data Source and change its description column
- Currency: change the currency format
- Date: change the date format, and the earliest and latest year to accept
- DateTime: change the date format
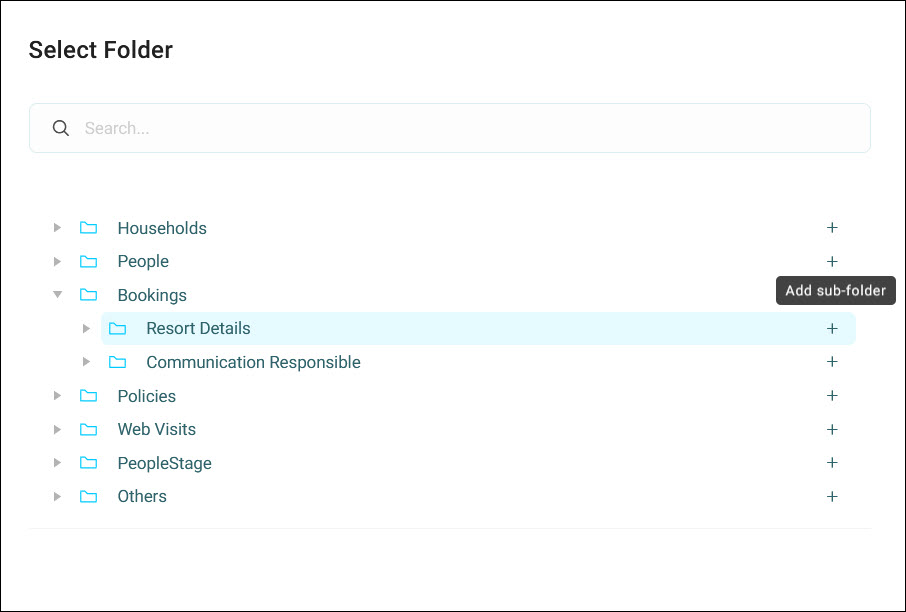
Name each variable (up to 80 characters) and choose its Destination Folder: choose Select Folder, then select a folder to choose it.
Tip
Select the + icon next to any folder to add a new sub-folder there. A newly added folder shows rename and delete icons so you can adjust it before moving on.
Note
If you've chosen the wrong folder, select the bin icon next to your selected folder to clear it and choose again.
Select Create.
Edit an uploaded variable
Edit a custom variable created from an uploaded file without recreating it. This opens the same dialog you used to create it, pre-populated with its current settings, including the source file reference, name, and folder. Change what you need and save. You'll see a confirmation notification once your changes take effect.
You can only edit the single variable you opened it from. You can't add further columns from an existing upload this way. If you change the variable's Type, you're limited to converting within these groups:
- Selector: no conversion to another type
- Date and DateTime: interchangeable with each other only
- Text, Numeric, and Currency: interchangeable with each other only
Note
You can only edit variables created by uploading data. If FastStats built a variable, rather than a user, you can't edit it from Orbit.