Setting up single sign-on with Azure Active Directory
This article takes an administrator through the process of setting up Single Sign-On (SSO) with Azure Active Directory (AD). It uses Security Assertion Markup Language (SAML) for authentication.
Create an app in the Azure portal
-
Navigate to the Azure Active Directory service.

-
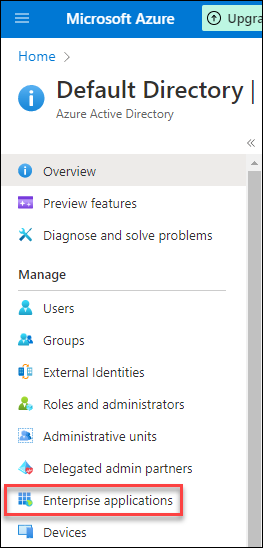
Select Enterprise applications from the Manage menu on the left.
-
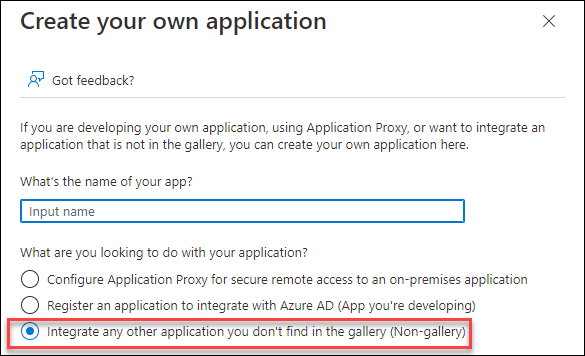
Select New Application, then Create your own application.
-
Give your application a name and select Integrate any other application you don't find in the gallery (Non-gallery). Select Create.
-
Wait while the system creates the application.
Configure SAML for the app
-
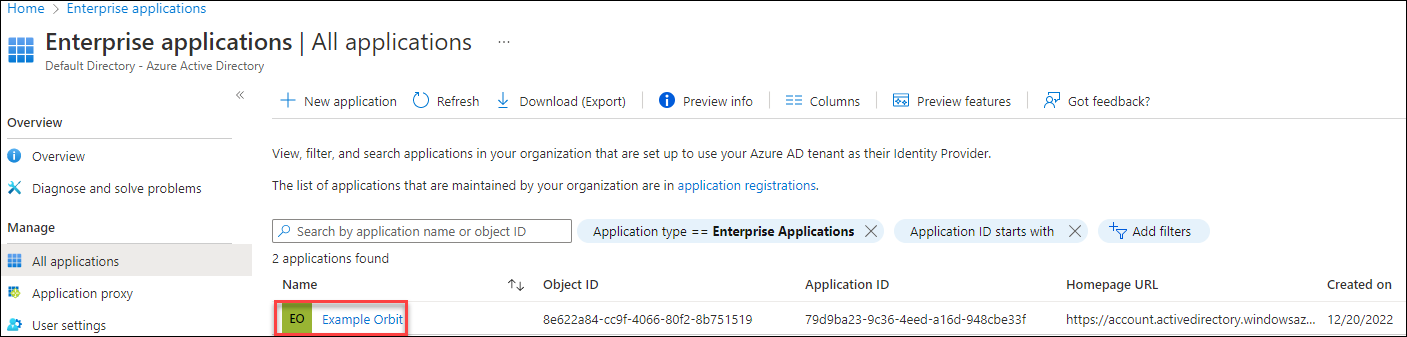
From the list of applications, select the name of the application you created.
-
Select Set up single sign on, then SAML to open the Set up Single Sign-On with SAML page.
-
Edit the Basic SAML Configuration with the following values (substitute your actual server address for the placeholder):
Configuration item Value Identifier (Entity ID) https://AptecoLoginAPI/Reply URL (Assertion Consumer Service URL) https://[your-server]/OrbitAPI/ExternalLogin/AssertionConsumerService/Sign on URL https://[your-server]/OrbitAPI/ExternalLogin/AssertionConsumerService/Relay State (Optional) https://[your-server]/Orbit/external-login/ -
Select Save.
- From section 3 SAML Certificates, download the Certificate (Base64). You may choose to name it
Azure.cer. -
From section 4 Set up (app), copy the:
- Login URL:
https://login.microsoftonline.com/[GUID]/saml2 - Azure AD Identifier:
https://sts.windows.net/[GUID]/
Substitute your actual Azure GUID into these URLs.
- Login URL:
Configure the Orbit Login Service
See Orbit login service to install and configure the Login Service first.
-
Move the downloaded certificate to the certificates folder:
-
Edit the Orbit Login Service configuration file with the following JSON:
JSON{ "Serilog": { "MinimumLevel": { "Default": "Debug", "Override": { "Microsoft": "Debug", "System": "Debug", "ComponentSpace.Saml2": "Debug" } }, "WriteTo": [ { "Name": "Trace" }, { "Name": "RollingFile", "Args": { "pathFormat": "C:\\temp\\Orbit\\Logs\\OrbitLogin-{Date}.txt" } } ], "Enrich": ["FromLogContext", "WithMachineName", "WithThreadId"] }, "Kestrel": { "Endpoints": { "Http": { "Url": "http://localhost:5005" } } }, "AllowedHosts": "*", "SAML": { "$schema": "https://www.componentspace.com/schemas/saml-config-schema-v1.0.json", "Configurations": [ { "LocalServiceProviderConfiguration": { "Name": "https://AptecoLoginApi/", "Description": "Apteco Orbit Login API", "AssertionConsumerServiceUrl": "https://example.com/OrbitAPI/ExternalLogin/AssertionConsumerService", "LocalCertificates": [ { "FileName": "certificates/sp.pfx", "Password": "password" } ] }, "PartnerIdentityProviderConfigurations": [ { "Name": "https://sts.windows.net/<GUID>/", "Description": "Azure", "SignAuthnRequest": true, "SingleSignOnServiceUrl": "https://login.microsoftonline.com/<GUID>/saml2", "PartnerCertificates": [ { "FileName": "certificates/Azure.cer" } ] } ] } ] }, "PartnerName": "https://sts.windows.net/<GUID>/", "JWT": { "Key": "VerySecretSecurityJWTKey", "Issuer": "https://AptecoLoginApi/" }, "AllowedReturnUrlOrigins": "https://example.com/" }Substitute
<GUID>with your actual Azure GUID. The following parameters are unique to your Azure instance:Parameter Azure value SingleSignOnServiceUrlLogin URL from Azure PartnerCertificates.FileNameFilename of the certificate (e.g. certificates/Azure.cer)AllowedReturnUrlOriginsBase address of the website hosting Orbit
Add users to the Azure application
Add users to the Azure application using the email address associated with the Apteco system.
-
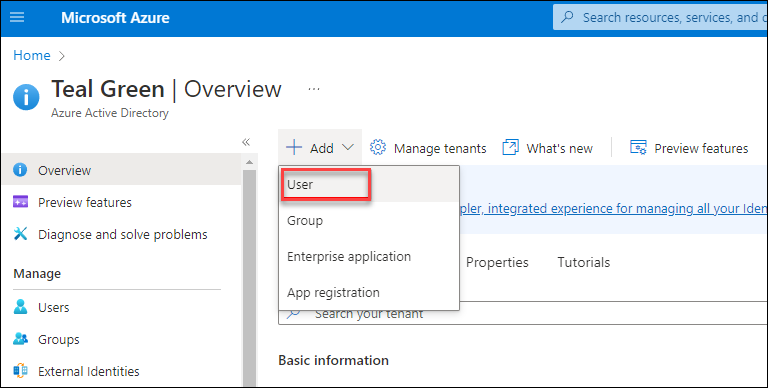
In Azure AD, select +Add > User.
-
Choose Create user or Invite user, and enter the user's details including email address. Invited users receive an email from
invites@microsoft.comwith a link to connect with the new application.
Assign users to the app
- From Enterprise applications, choose the application you created.
-
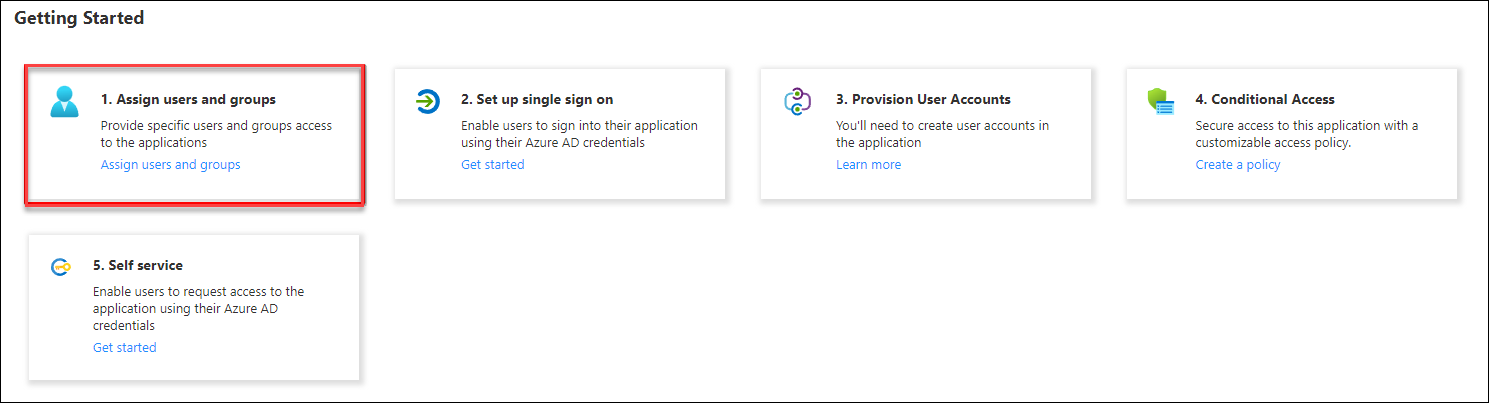
Select Assign users and groups.
-
Select +Add user/group.
-
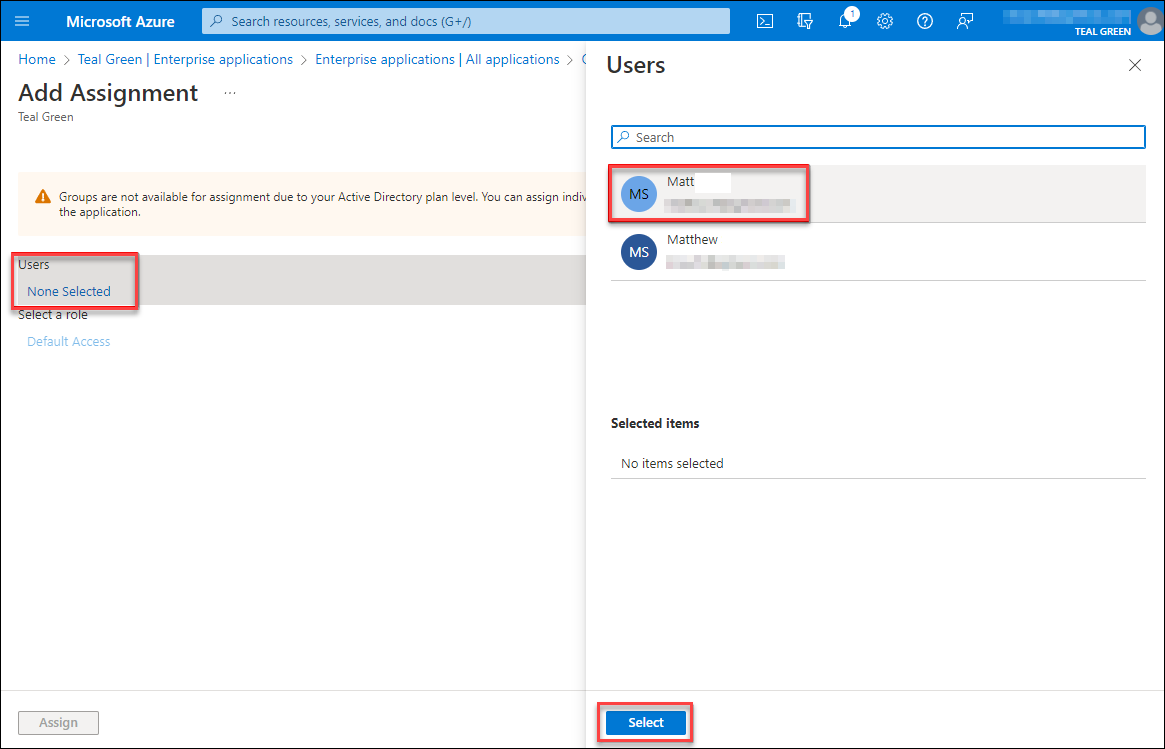
Choose Users (None Selected) to open the Users panel, select the user to add, then confirm with Select.
-
Select Assign.
Troubleshooting
Logging in causes a "no dataview" error
When logging in, Orbit displays the following error:
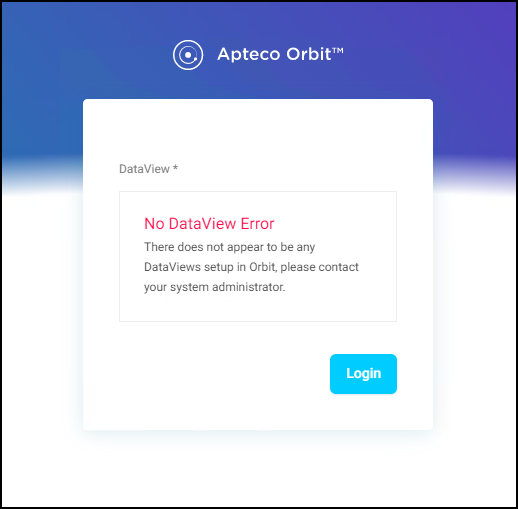
Azure passes User.userprincipalname instead of the user's email address, which causes this error.
- Log in to portal.azure.com.
- Select Azure Active Directory > Enterprise Applications > Your Application.
- Select Set up single sign on.
-
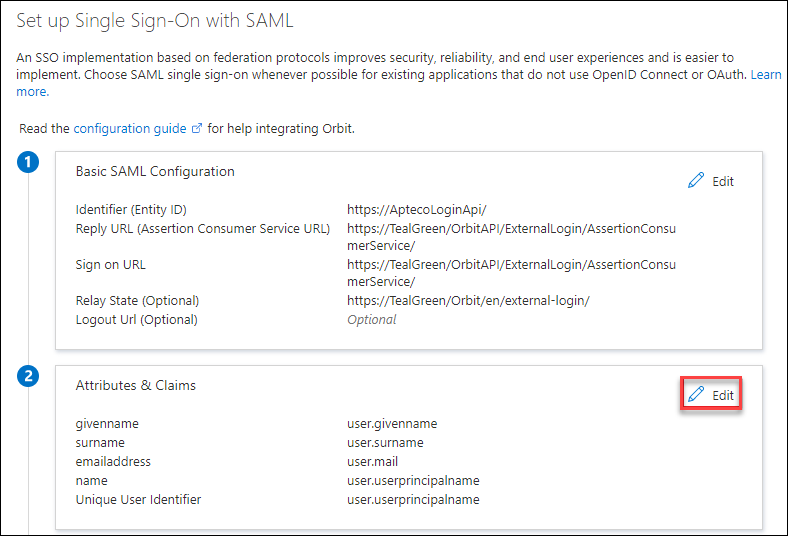
In Attributes & Claims, select Edit.
-
Select the default claim name (
user.userprincipalname) to edit it.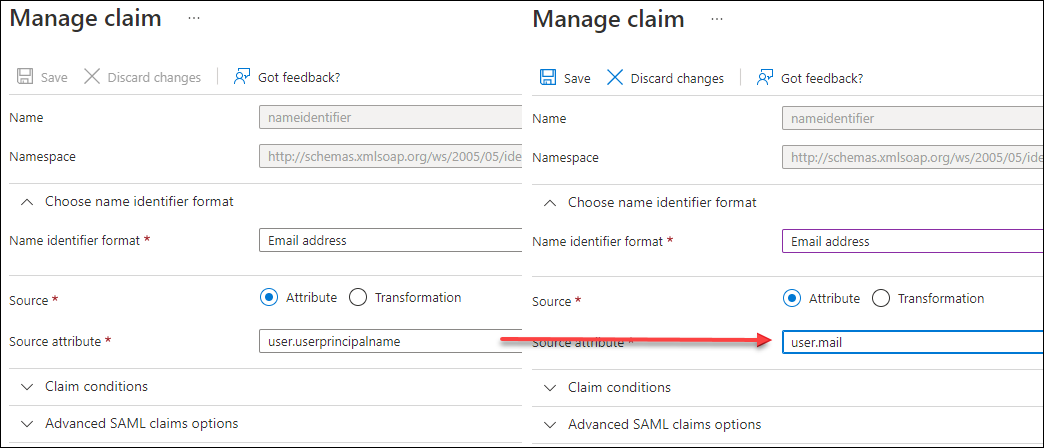
-
Change Source Attribute to
user.mailand select Save.
When the user refreshes their browser, they will be able to sign in.