Folder structure
The Folder Structure tab lets you organise the folders and variables in your system to reflect the way your organisation works. Orbit Connect starts you off with a default structure based on your system diagram. You can then create, rename, and remove folders, and arrange variables where they're easiest to find.
Before you start
To structure your folders:
- Your server must have Apteco software version Q3 2026 or later
-
An administrator must turn on the User Defined Folder Structure feature:
- Select Account and Settings in the top right corner.
- Select Preview Features.
- Turn on User Defined Folder Structure.
Note
If your server doesn't have Apteco software version Q3 2026 or later, the User Defined Folder Structure setting shows a message saying the feature isn't supported by the version of the FastStats components installed on your server. Contact your partner or technical administrator to upgrade them.
Default folder structure
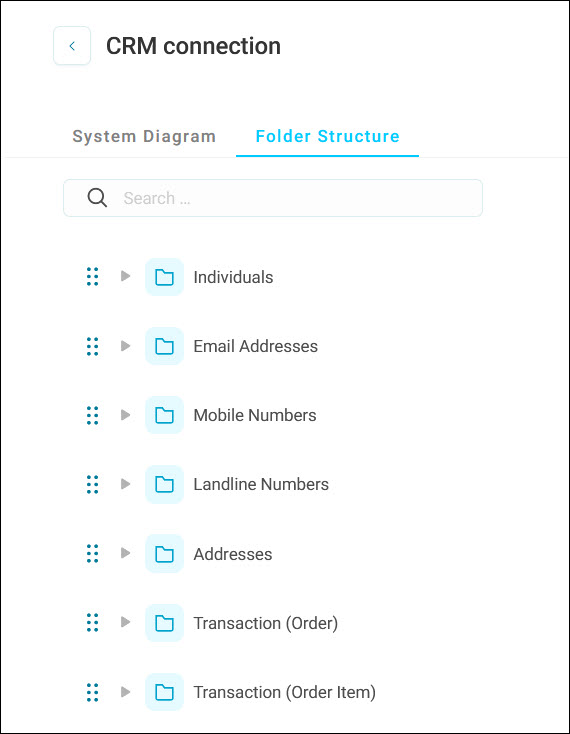
Orbit Connect creates a folder for every table in your system diagram, containing that table's variables. Folders follow the order of the diagram: from the top down, then from left to right.
Example
An Apteco CDP system starts with Individuals, followed by Email Addresses, Mobile Numbers, and Landline Numbers, with the transaction tables further down.
To see the default structure:
- Go to System Builds.
- On your system, open the option menu and select Edit, or create a new system. See Defining a system.
- Add tables to your system diagram.
- Select the Folder Structure tab.
Note
The System Diagram and Folder Structure tabs share one save. Selecting Save on either tab saves both, and Build System saves your changes before it builds the system.
Organise folders and variables
You can move folders and variables one at a time or several at once.
Move a single item
Drag a folder or variable by its grab handle:
- Drop it between two items to place it there
- Drop it on a folder to move it inside that folder
Tip
To scroll the window while dragging, drag the item towards the top or bottom edge.
You can also open the option menu on any folder or variable and select Move to choose a destination from a list.
Move several items
To move several items:
-
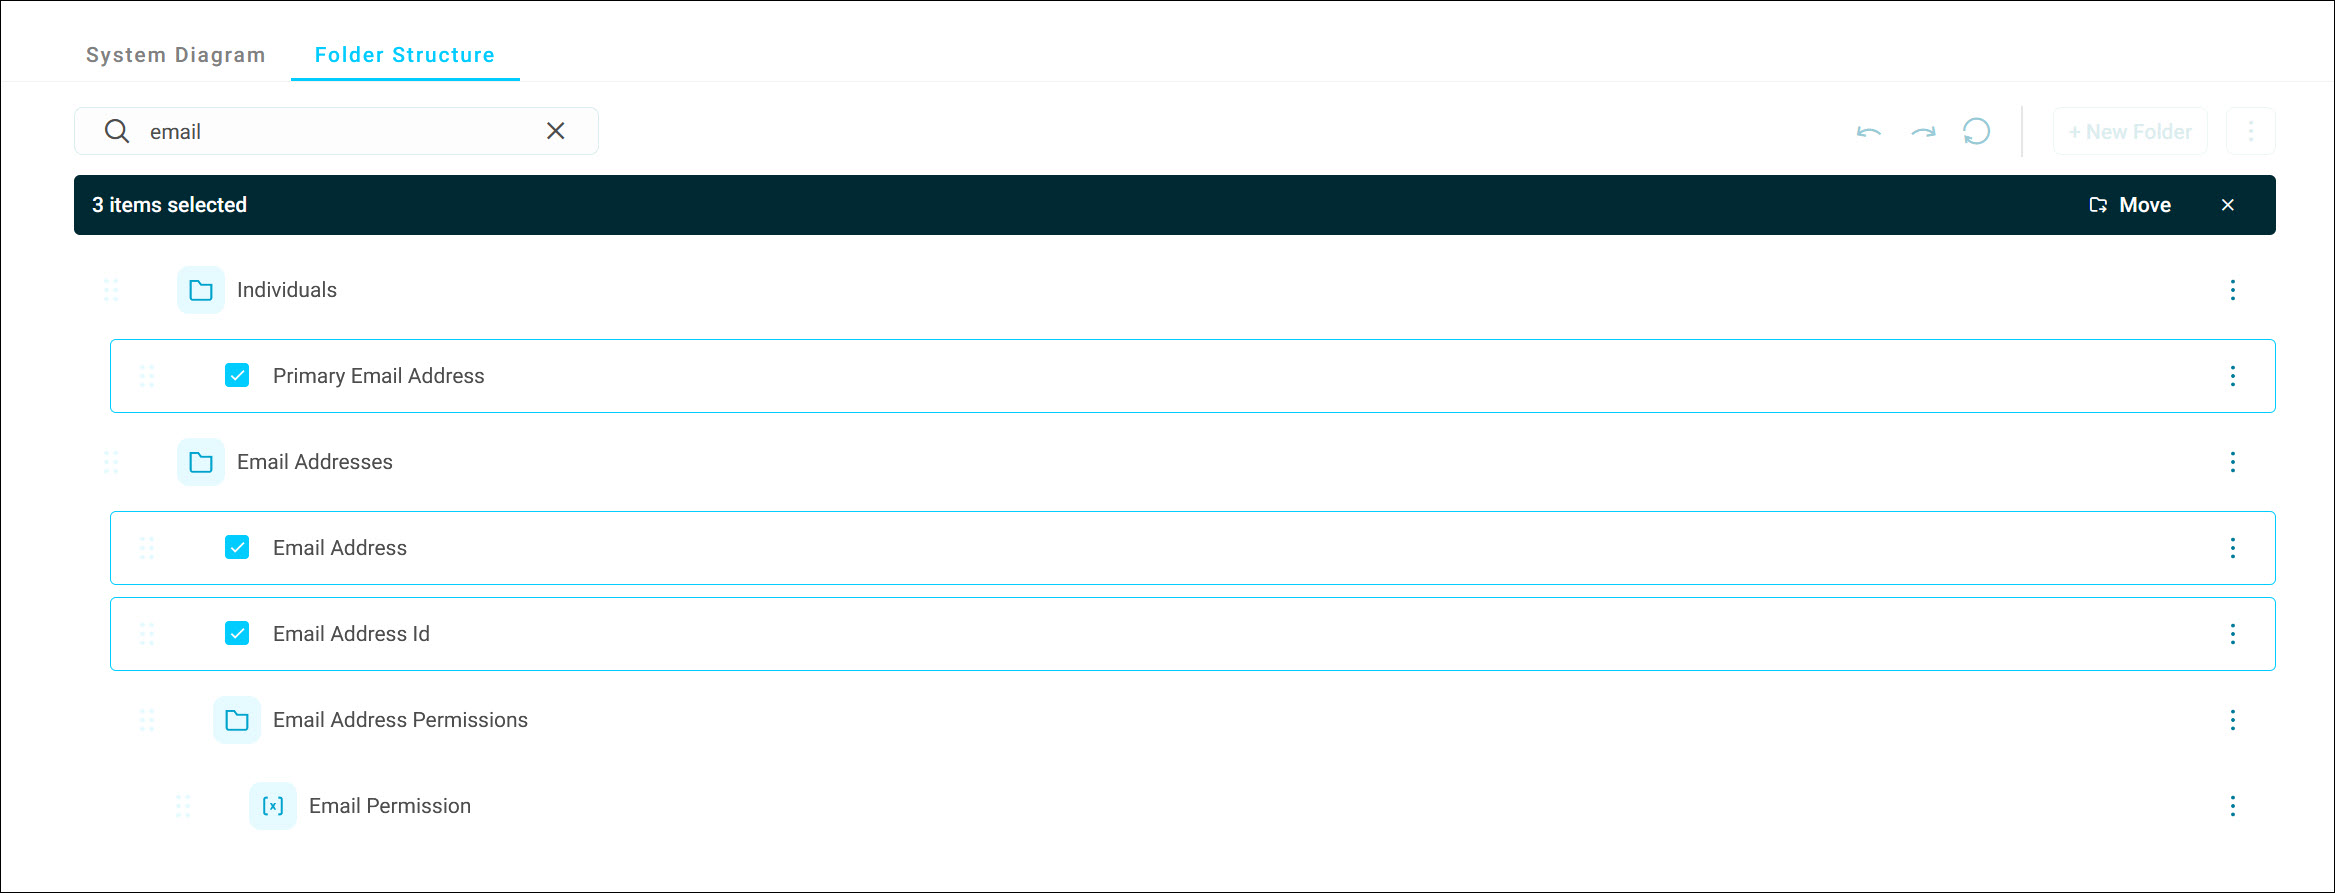
Hover over an item and select its tick box. Repeat for each item you want to move. The number of selected items appears in a bar at the top of the tab.
-
In the selection bar, select Move.
-
Choose a destination folder, then select Move.
You can search for a destination folder, or expand folders to find a subfolder. Destinations you can't use are greyed out, such as the folders your selected items are already in.
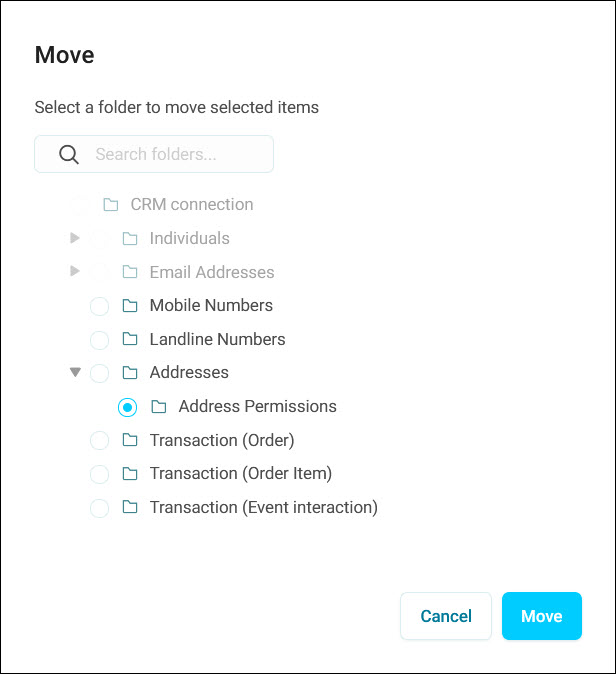
Moved items appear at the top of the destination folder, and the folder expands to show them.
Tip
Use search to select items from across your whole system. Your selection stays in place when you change the search term, so you can search for "email", tick the items you want, then search for "mobile" and tick more before moving them all together. Search results show matching items within their folders.
Example use case
Group contact details
A charity wants supporters' contact information in one place. They create a top-level folder called Contact details, move the Email Addresses, Mobile Numbers, Landline Numbers, and Addresses folders into it, then move Contact details inside Individuals.
Undo your changes
Use the icons at the top right of the tab:
- Undo: Reverse your last change
- Redo: Reapply a change you've undone
- Reset: Return to the structure as it was before your unsaved changes
Manage folders
Create your own folders to group variables in a way that suits your users, and rename, move, or remove folders as your structure changes.
Create a folder
- To add a top-level folder, select + New Folder
- To add a folder inside another, open the folder's option menu and select Add Subfolder
New folders always appear at the top of their parent folder.
Folder names must be unique across your system.
Note
Only folders can sit at the top level of the structure. Variables must be inside a folder.
Rename, move, or delete a folder
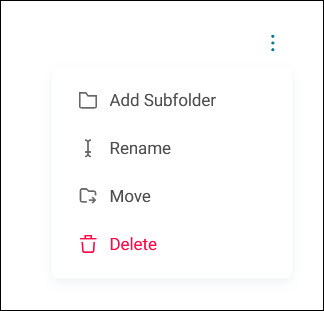
Open a folder's option menu to:
- Add Subfolder
- Rename the folder
- Move the folder to another location
- Delete the folder
You can only delete an empty folder, so the Delete option only appears once you've moved all the folder's contents elsewhere.
Expand or collapse folders
Open the option menu at the top right of the tab, next to + New Folder, then:
- Use Expand All to show everything in your structure
- Use Collapse All to close every folder
When your system diagram changes
If you add a table to your system diagram after you've saved your system definition, Orbit Connect adds its variables to a new folder in the default position.
If you remove a table after you've saved your system definition, its variables are removed from the folder structure, but its folder stays. Delete the empty folder yourself if you no longer need it.
Note
If you remove a table before you first save your system definition, no folder is created for it.
Save and build
When you're happy with your folder structure:
- Select Save.
- Build and deploy your system to make the new structure available in Orbit. See Building a system and Deploying a system.