Redirect sections
Redirect sections in Orbit help you organise complex campaign journeys by breaking them into structured, manageable stages. They let you handle multiple paths within a campaign, especially when your journey depends on how recipients behave. You can use redirect sections to group logic and follow-up actions together, making large campaigns easier to manage and understand.
Use redirect sections to:
- Redirect recipients based on campaign rules, such as cancellations or opt-outs
- Target communications by sending follow-up messages to those who complete campaign goals
- Combine audience segments based on their interactions
- Loop recipients back into the journey at a previous step
Redirect sections range from simple to highly complex, with the same functionality as the main campaign journey builder.
Example use cases
Exit handling
Keep the main diagram uncluttered by grouping all exit-related paths in one place. Create an Exit Section to manage exits efficiently. Redirect all Bounced and Unsubscribed recipients to this section, along with any other segments leaving the campaign.
Offer campaign
Ensure non-responders get a reminder and loop back to check for redemption. In an offer campaign, manage two paths for people who haven't interacted with your offer:
- Create a There is still time redirect section with a three-day delay and a reminder email
- Set up a Redeem Offer redirect section to check for redemptions and redirect paths accordingly
Using redirect sections
You can create redirect sections within your journey, redirect any paths in or out of them, and duplicate sections for easy reuse.
Creating a redirect section
To create a redirect section:
- From the Campaigns screen, select your campaign.
- Click Journey.
-
Add a new redirect section using one of the following methods:
-
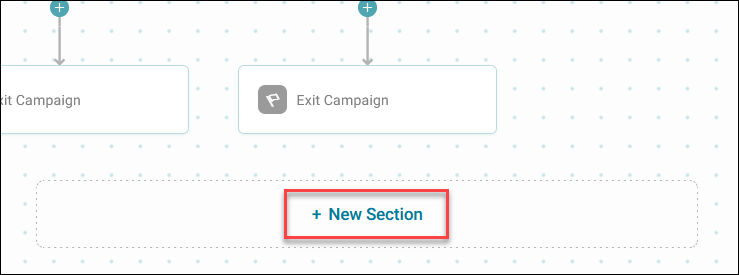
Click + New Section below your journey.
-
Click a + above where you want to start a new redirect, then click Redirect.
This creates a new campaign section. The preceding journey step becomes a Path redirect.
Note
When adding a redirect section, all steps after a path redirect are automatically included.
-
-
Rename redirect sections to clarify their purpose. Click directly on the section name and edit it in place, or use the option menu.
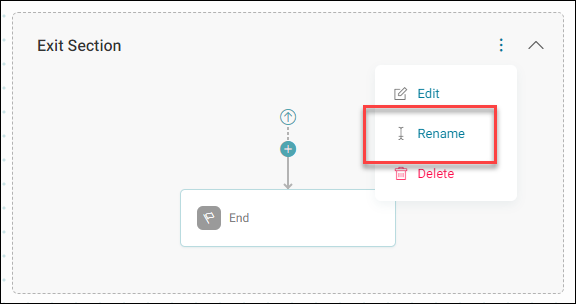
You can now add more paths to redirect your main diagram to this section.
Redirecting paths to a redirect section
To redirect more paths to your section:
- Expand the option menu on your redirect section, then click Edit.
-
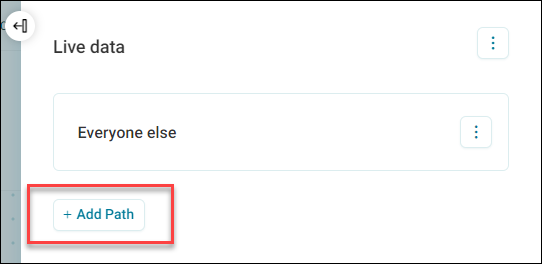
Click + Add Path.
-
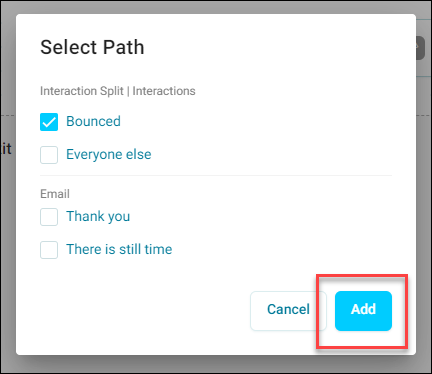
Select the path(s) to redirect, then click Add.
-
When you have all the relevant paths leading into the redirect section, click Apply.
Note
Clicking an arrow below a redirect step takes you to the relevant redirect section.
-
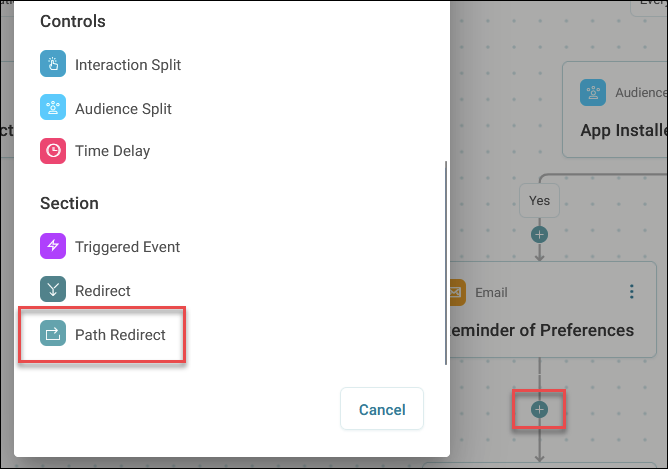
You can also redirect additional paths by clicking the + on any path in the journey diagram. Click Path Redirect, select the redirect section, then click OK.
Note
If no redirects exist, then a Redirect isn't available in the Add Step dialog box.
You can now copy your sections steps and reuse them in other parts of your campaign journey.
When you go to publish your campaign, the Publish Summary screen shows details of any sections with redirected paths, including the type of journey step that redirected to the section.
Note
You can reorder your sections using drag-and-drop functionality.
Note
If you want to delete a section, and the section has no parent items, then a dialog box appears indicating that all child steps will be deleted.
Duplicating a redirect section
Duplicate sections to maintain consistency, test variations, and reduce errors.
To duplicate a redirect section:
- Open your campaign journey.
-
Expand the option menu on the section you want to duplicate, then click Duplicate.
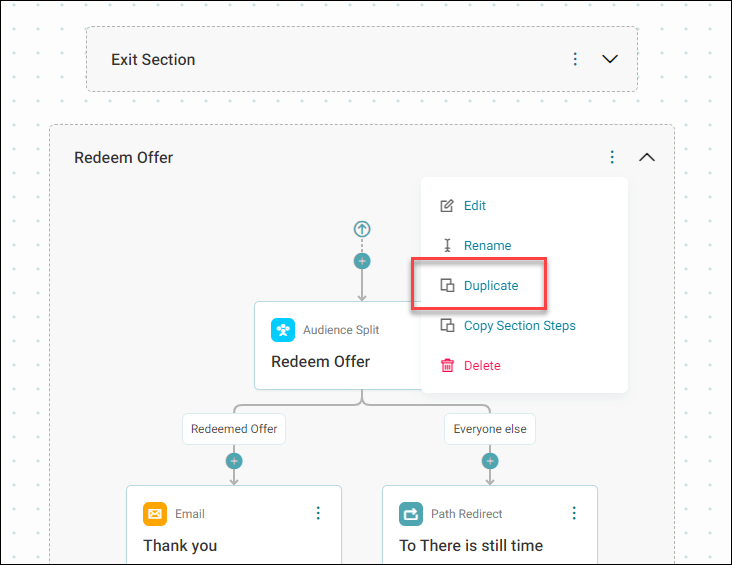
The duplicated redirect section appears at the end of the list with the original redirect name followed by '(Copy)'.
You can rename your duplicated section, as required.
You can now reuse this duplicated section in your campaign journey.
Note
Redirect paths automatically point to the new redirect section.
Note
Rename the duplicated redirect section as needed.
Creating loops between redirect sections
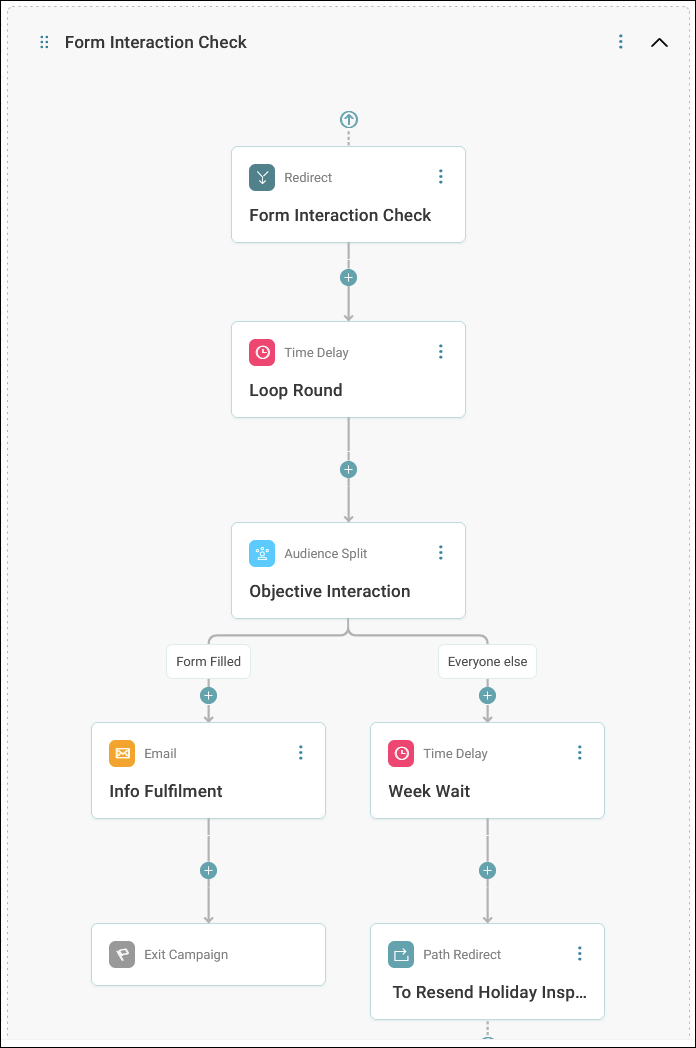
A loop in an Orbit journey allows a redirect section to send contacts to another redirect section and then back around, ensuring a continuous re-evaluation of conditions. This can be useful for checking user engagement, collecting responses, or ensuring follow-ups occur without manual intervention.
How loops work
Loops in an Orbit journey:
- One section redirects contacts to another
- That redirect section processes them and eventually sends them back to the original redirect
- A time delay ensures the process runs continuously, at set intervals, until a set date
- Audience splits determine whether contacts remain in the loop or exit the journey
Time delay step
A time delay is essential to prevent immediate repetition and to ensure the loop runs at specific intervals. See Time delays.
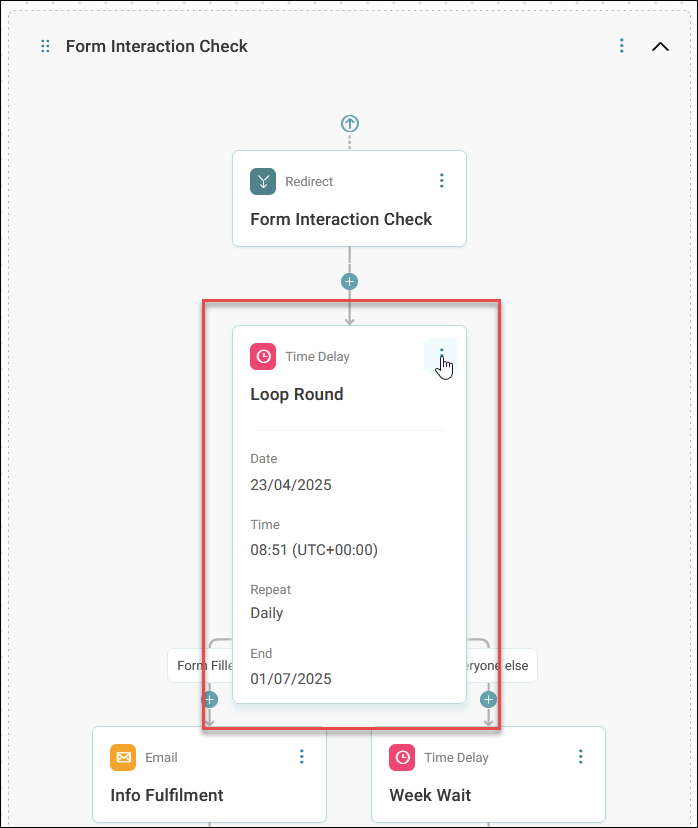
The example below shows a flexible use case for using loops with a time delay in your Orbit journey.
Use loops and redirect sections to manage repeated checks
Use redirect sections and loops to keep checking for customer interactions and respond appropriately over time.
This process works well when:
- You want to repeat actions until a customer completes a task
- You want to avoid sending the same content repeatedly to engaged customers
- You need to manage exits based on interaction
The following process outlines the key steps, with an example campaign about holiday destinations.
To set up a loop:
-
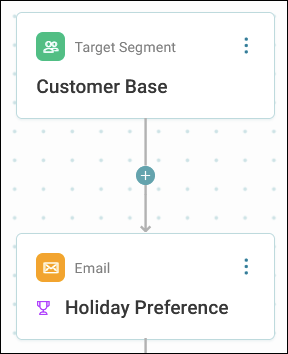
Start the journey with an email
Send an email prompting customers to engage.
Example
Ask your customers to update their preferred holiday destinations with an email titled Holiday Preference, and a link to a preference form.
-
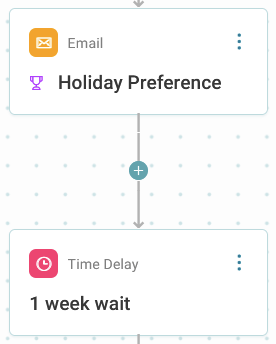
Add a time delay
Include a delay to give customers time to respond.
Example
Add a 1-week delay before the next action.
-
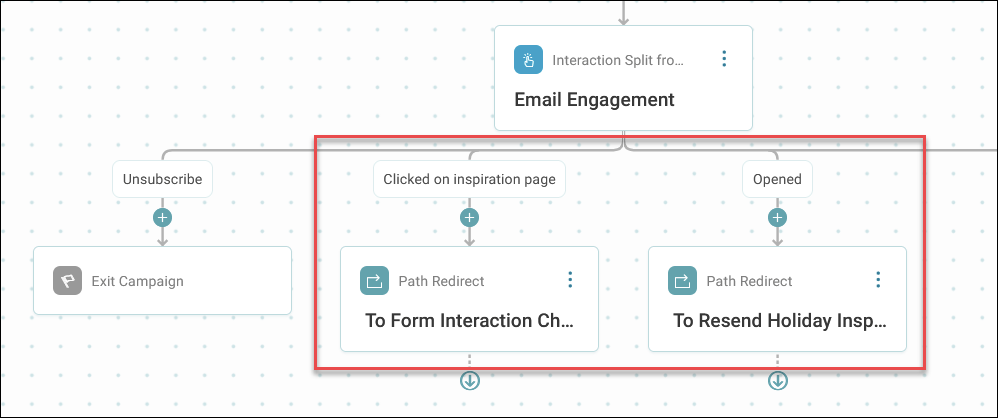
Check for email engagement
Use Interaction splits:
- If a customer clicks the email link, send them to a form interaction check redirect
- If they don’t interact, send them to a resend redirect
Example
Customers who click go to a section that checks if they filled in the form. Others go to a section that may resend the email.
-
Add a time delay to create the loop
Set a time delay at the start of a redirect section to run on a particular date with a repeating schedule. This forces the section to continually run and check for interaction.
Example
This time delay is set to run every day until the beginning of July.
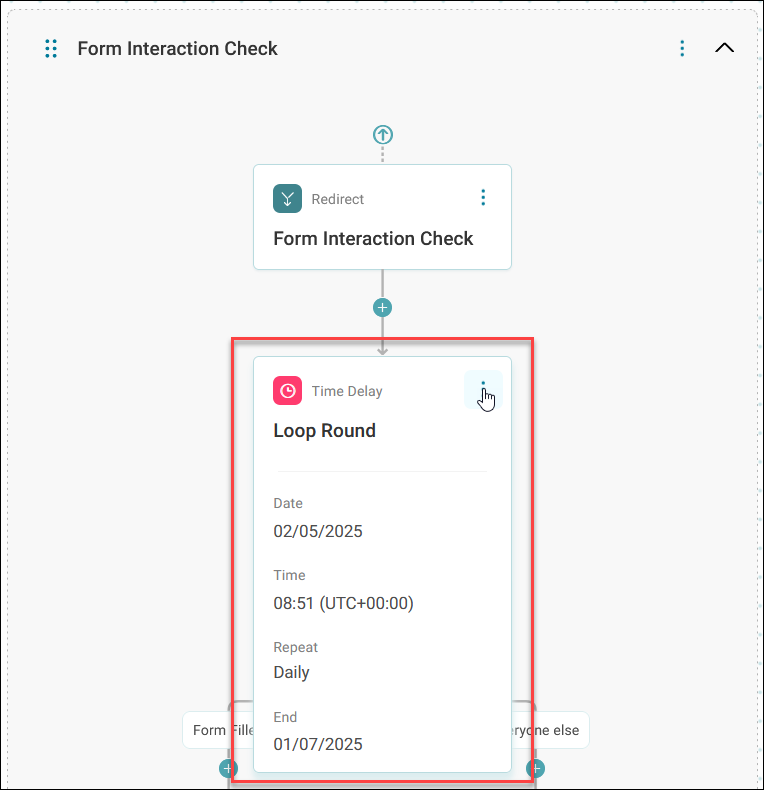
Once you’ve set your repeating time delay and it begins, the section will check for any interaction you’ve set up.
-
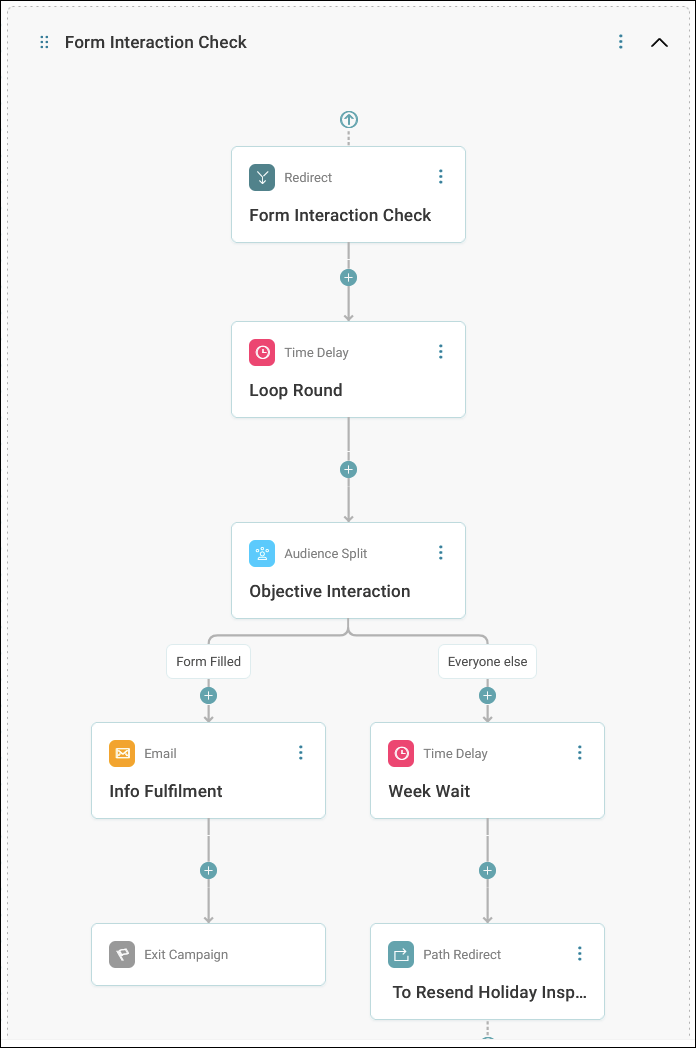
Check for form completion
Use an audience split inside the form interaction check:
- If the customer completed the form, exit the loop and send a relevant follow-up
- If not, add a delay and move them to the resend redirect
Example
If someone starts but doesn’t complete the destination form, wait a day, then try nudging them again.
-
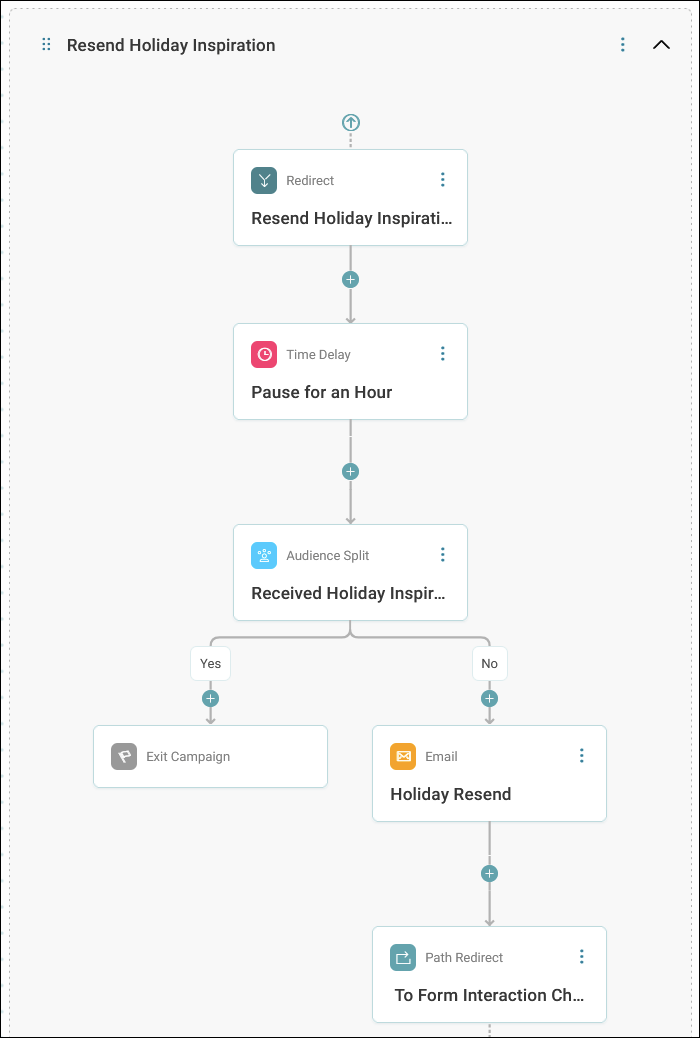
Resend content selectively
In the resend section:
- Add a short delay (e.g., 1 hour)
-
Use an audience split to check if the customer already received the resend
- If they have, exit the journey
- If not, send the email again
Example
Only send the holiday inspiration email again to customers who didn’t receive it before.
-
Loop back to check again
After resending:
- Redirect customers back to the form interaction check
- Continue the loop until an end date or completion
Note
Keep checking daily until the campaign end date, or until the customer completes the form.
This process highlights the power and flexibility of redirect sections and loops within your Orbit journey.